Remotely Access and Control Home Assistant
Published at December 22, 2020 · 11 min read
Share on:Home Assistant is a free and open-source system for home automation and allows you to view the status and control various IoT and smart devices in your home. Once Home Assistant is setup it will scan your network for devices and identify them. You can setup credentials for these devices and with the help of a plugin for the device, it can be controlled and automated through Home Assistant’s web dashboard.
You can control lights, thermostats, robot vacuum cleaners and many more devices.
Home Assistant
I discovered Home Assistant (HA) through one of my users discovering an issue in our client program with handling web sockets. I setup Home Assistant to duplicate the issue and debug it and thought it would be helpful to share what I did.
I don’t run or use IoT or smart devices in my home (yet) but if I did I would want to setup as many layers of security as I could to protect the devices in my home and on my network. In this tutorial we’re going to use a custom domain to implement end-to-end encryption with TLS certificates and private keys controlled by the client.
Packetriot provides TLS for all tunnel traffic, but it utilizes the Packetriot wildcard *.pktriot.net certificate and TLS is terminated at our servers. Note, the traffic is still tunneled over TLS, it’s just not two layers of TLS as this setup will be.
Docker makes setting up Home Assistant (HA) very simple so we will be using it to host the HA and the tunnel containers. Docker is available on Linux, Mac and Windows. We’ll be working through this tutorial in Linux but the steps are fairly similar (in nature) for each platform.
Using Docker Compose will make creating and updating our containers simple as well.
One thing I’ll point out is that Home Assistant is built to scan your network and detect these smart devices in your home. To do this it needs to be bridged to the network interfaces on the host. Our configuration is going to implement this. I’m bringing this up now so you’re aware of this activity by HA on your network. Layers of virtualization may prevent HA from functioning as intended.
Let’s get started!
Setup and Start Containers
Below is the compose file we’re going to use. It includes a container called pktriot-tunnel for running and hosting our Packetriot tunnel and another called home-assistant for running HA.
Typically you want to run containers within their own virtual network. This helps isolate them from the host and is good from a security perspective. However, Home Assistant can scan your local network to automatically detect of devices it supports. This is convenient if you have a lot of devices.
This means that the container for HA needs to be on the same network as the host. This also implies that the Packetriot tunnel (client) needs to be on the host network since it would otherwise be isolated from communicating to the host running the HA container.
We attach the containers to the host network using the option network_mode: host for both containers in the compose file.
version: '3'

services:
  pktriot-tunnel:
    image: packetriot/pktriot:latest
    restart: unless-stopped
    network_mode: host
    volumes:
      - ./pktriot:/data

  home-assistant:
    image: homeassistant/home-assistant:stable
    restart: unless-stopped
    network_mode: host
    ports:
      - 8123
    volumes:
      - ./home-assistant:/config
      - /etc/localtime:/etc/localtime:ro
My convention for setting up services with Docker starts with creating a base directory where the compose file is stored. I use sub-directories, indicated in the compose file, to create individual “data” directories for the containers, e.g. ./home-assistant and ./pktriot. This does two things for me:
- Straight-forward to backup data for containers (just backup the entire directory)
- Simple to migrate those containers to other hosts
I’ll be creating a directory called containers but you can choose any name you’d like. If you’re following other tutorials we’ve written, you can pretty much just add the service block for home-assistant to an existing compose file you’re maintaining.
[user@host ] mkdir containers/bitwarden
[user@host ] cd ~/containers
With your favorite editor create the compose file. You can copy & paste our example and it’ll work just fine.
[user@host:~/containers ] vim docker-compose.yml
Once the compose file is created and save we can use the docker-compose command to create the virtual network and containers. It will download any images in case they’re not available locally.
[user@host:~/containers ] docker-compose up -d
...
...
Creating network "home-assistant_default" with the default driver
Creating home-assistant_pktriot-tunnel_1 ... done
Creating home-assistant_home-assistant_1 ... done
All of the containers should be up and running.
[user@host:~/containers ] docker ps
CONTAINER ID        IMAGE                                 COMMAND                  CREATED             STATUS              PORTS               NAMES
b89bd8bb1978        homeassistant/home-assistant:stable   "/init"                  36 seconds ago      Up 34 seconds                           home-assistant_home-assistant_1
e0437af10e95        packetriot/pktriot:latest             "/usr/bin/pktriot --…"   36 seconds ago      Up 34 seconds                           home-assistant_pktriot-tunnel_1
The container for the Packetriot tunnel is up and running but it needs to be configured before any traffic can be tunneled through it.
Setup Tunnel & Traffic Rules
We’re going to configure and setup the traffic rule for the tunnel that will serve our Home Assitant service. In this tutorial we are using a custom domain, so be sure to verify a custom domain you own that you are using to follow along.
Change into the containers directory. We’ll use the command docker exec -it to execute a command inside the pktriot container to configure a new tunnel. The flag -it is critical since we will be inputting information during the configuration steps.
[user@host:~/containers ] docker exec -it home-assistant_pktriot-tunnel_1 pktriot configure
Choose a path to the configuration file:
[1] /etc/pktriot/config.json
[2] /data/config.json
[3] /root/.pktriot/config.json

Input selection [#]: 2
Choose option [2] to store the configuration in /data/config.json. This file will be available on your host in the path ~/containers/pktriot/config.json.
Be sure to chose a region that is closest to you geographically.
Authenticate client with login credentials. Created account w/Google SSO? Use --url with 'configure'.

Email: user@email.com
Password:
Authenticated!

Choose the region for the edge server to connect to:
+------------------------+
| #   | Region           |
+------------------------+
| 1   | us-east          |
+------------------------+
| 2   | us-west          |
+------------------------+
| 3   | eu-central       |
+------------------------+
| 4   | asia-southeast   |
+------------------------+
| 5   | australia        |
+------------------------+
| 6   | us-south         |
+------------------------+
| 7   | asia-south       |
+------------------------+
| 8   | africa-south     |
+------------------------+

Input selection [#]: 1

Tunnel configuration:
  Hostname: friendly-dew-15444.pktriot.net
  Server: us-east-65319.packetriot.net
  IPv4: 159.203.126.35
  IPv6: 2604:a880:800:a1::dd:c001

Start the tunnel and visit URL to check its working:
  pktriot --config /data/config.json start
  https://friendly-dew-15444.pktriot.net

Detailed help and step-by-step tutorials:
  https://packetriot.com/docs
  https://packetriot.com/tutorials.

Need more support?
  Email: support@packetriot.com
  Twitter: @packetriot (please follow us, we like new friends :)
Make a note of the IPv4/v6 address of the Packetriot server this tunnel was assigned to. This assignment will not change and we can use the IP addresses to setup DNS A records for our custom domain. We can also use the hostname friendly-dew-15444.pktriot.net assigned to our tunnel for creating CNAME records.
We’re going to use the custom domain ha.packetdemo.com. Setting up an A or CNAME will work for creating DNS records for our custom domain. This step is critical before creating our HTTP/S traffic rule DNS is used by Let’s Encrypt to generate TLS certificates for our Home Assistant tunnel.
Once DNS is setup correctly we can add a new HTTP/S traffic rule to our tunnel configuration. We’ll enable Let’s Encrypt which automatically enables secure redirect. This will redirect all client traffic to HTTPS.
The destination we will use home-assistant. This is the name of the container from the compose file and Docker will resolve the name home-assistant to the virtual IP assigned to the container. In the case the containers’ IP changes, which happens, we won’t need to update our configuration.
The listening port for Home Assistant is 8123 so we will proxy traffic there.
[user@host:~/containers ] docker exec -it home-assistant_pktriot-tunnel_1 \
	pktriot tunnel http add --domain ha.packetdemo.com \
	--letsencrypt --destination home-assistant --http 8123

HTTP/S traffic rule added
Restart our tunnel so that the new rule is loaded. Note, it will take our 60-90 seconds for the TLS certificates to be generated. When they are available you’ll see a table printed out with more details.
[user@host:~/containers ] docker restart home-assistant_pktriot-tunnel_1

[user@host:~/containers ] docker logs -f home-assistant_pktriot-tunnel_1
Local server listening on http:80, https:443

Connecting to us-east-65319.packetriot.net...

Running HTTP services:
+-----------------------------------------------------------------------------------------------+
| Domain              | Destination      | HTTP   | TLS   | Secure   | Protect    | Site Root   |
+-----------------------------------------------------------------------------------------------+
| ha.packetdemo.com   | home-assistant   | 8123   | 0     | true     | Password   | --          |
+-----------------------------------------------------------------------------------------------+

Certificates from Let's Encrypt are loaded asynchronously, please be patient (<90s) when initializing new domains.

+----------------------------------------------------------+
| Certificate Domain   | Status      | Expiration          |
+----------------------------------------------------------+
| ha.packetdemo.com    | Available   | Mar 22 18:55 2021   |
+----------------------------------------------------------+
Our tunnel is configured with the traffic rule setup to serve our Home Assistant using TLS from Let’s Encrypt and is password-protected. We’re ready to visit HA and begin setting up our admin user.
Initial Home Assistant Setup
We’ll be visiting the URL https://ha.packetdemo.com to access our HA instance. You will be presented with a page from Home Assistant to setup a user and their credentials.
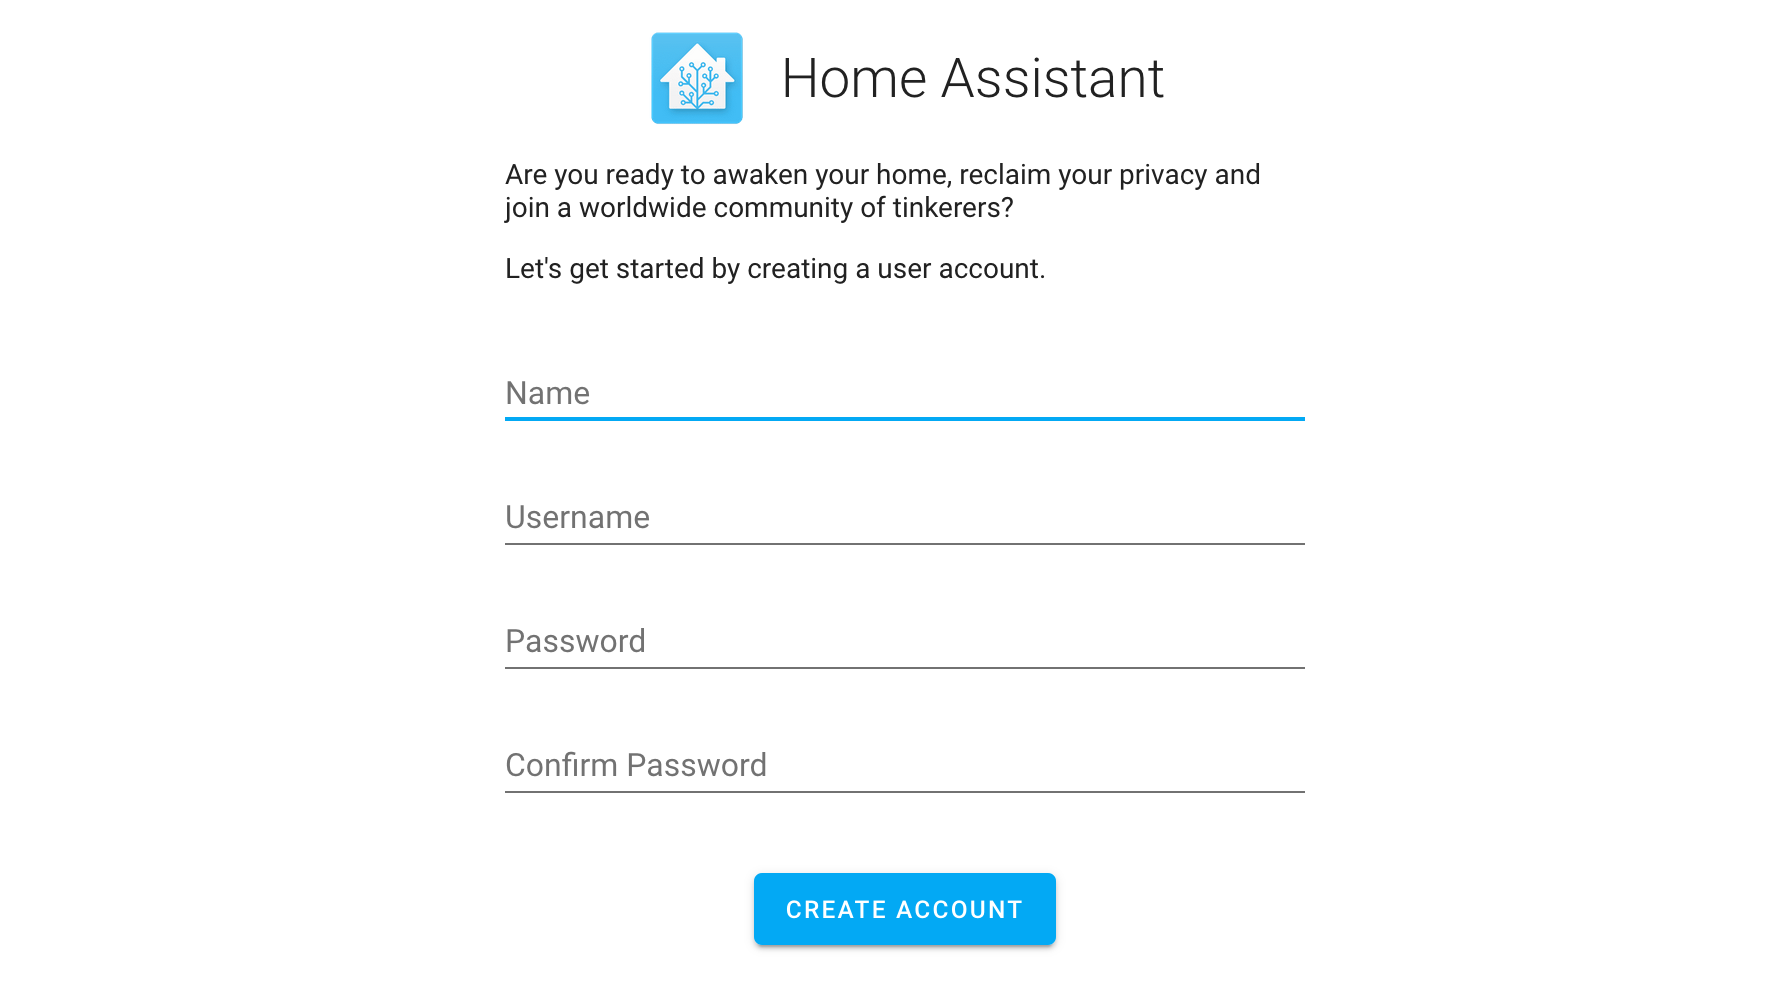
Create Home Assistant User
Once you create your user will be able to set or confirm a location for your home and make a few other small customizations. Finally, you’ll be presented the dashboard for Home Assistant.
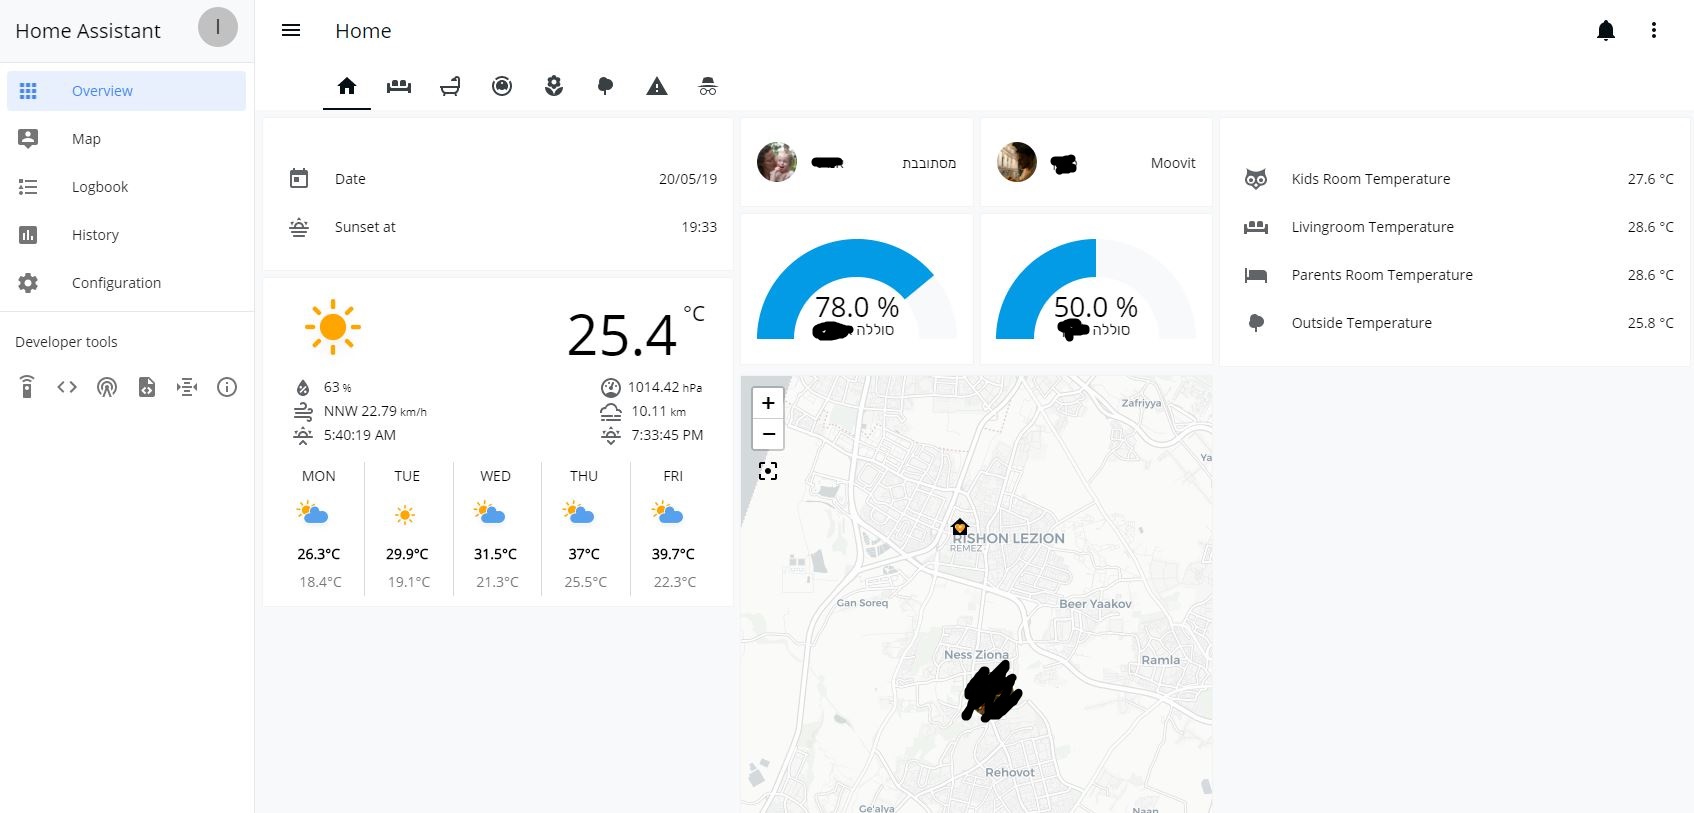
Home Assistant Dashboard
Our tutorial ends here as far as Home Assistant setup and configuration is concerned. I’m not actual Home Assistant expert :)
HA has a very expansive eco-system of plugins and opportunities to customize. They have a great community so I would check them out. The help page on the HA website has more resources as well.
Companion Apps
HA includes support for companion apps on smart phones/tablets and supports iOS and Android. So you can control your smart home from the couch or while you’re away.
I’d like to walk through some of the setup for the iOS application so we can review what information needs to be input while setting up a mobile app. Initially you’ll be presented with a view to begin the HA instance connection setup.
This prompt will be displayed if the mobile app isn’t able to detected to the HA instance automatically on your network, however, you want to manually input a URL to your HA instance so this way you can access it remotely when you’re not on your LAN.
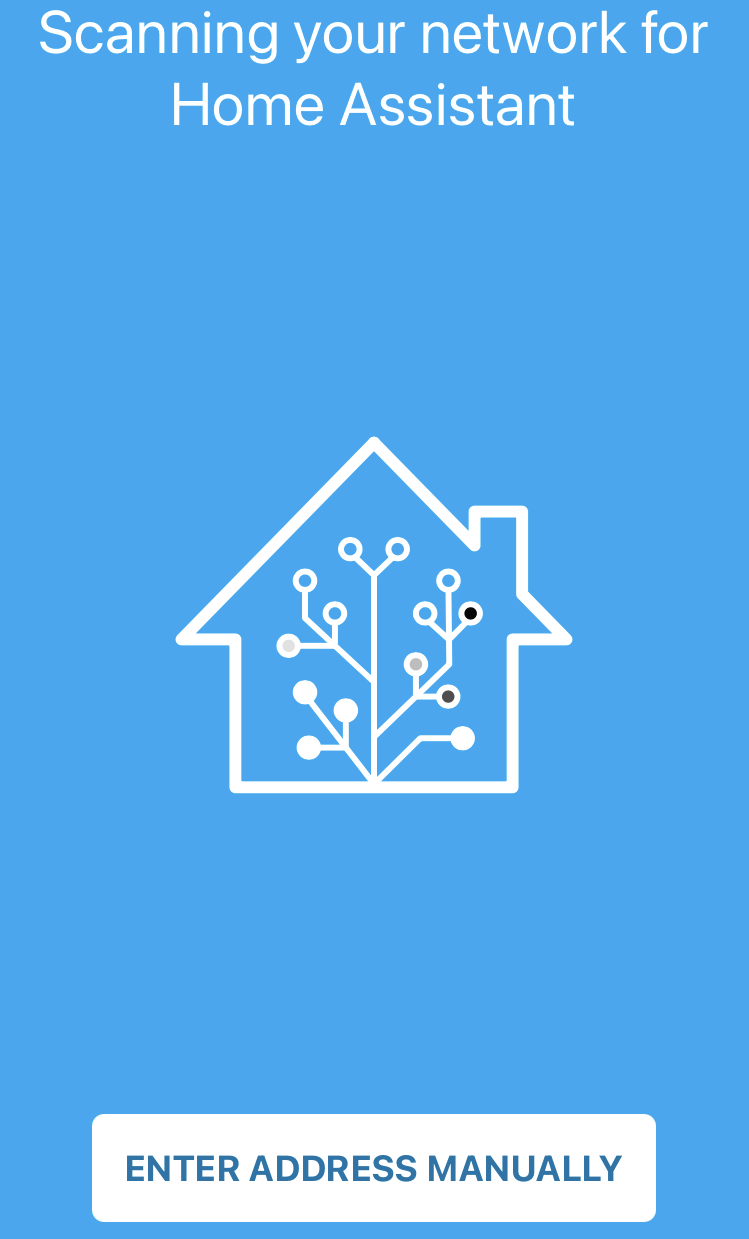
Mobile App Setup
Input the URL for your Home Assistant, in our case it’ll be https://ha.packetdemo.com
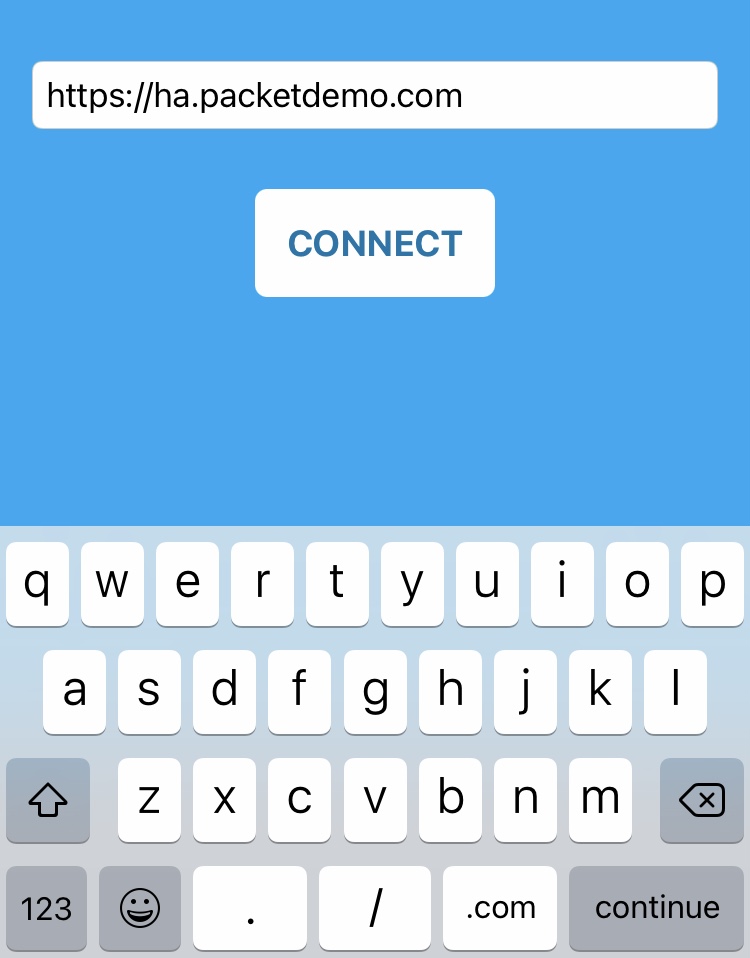
Setup URL for Home Assistant
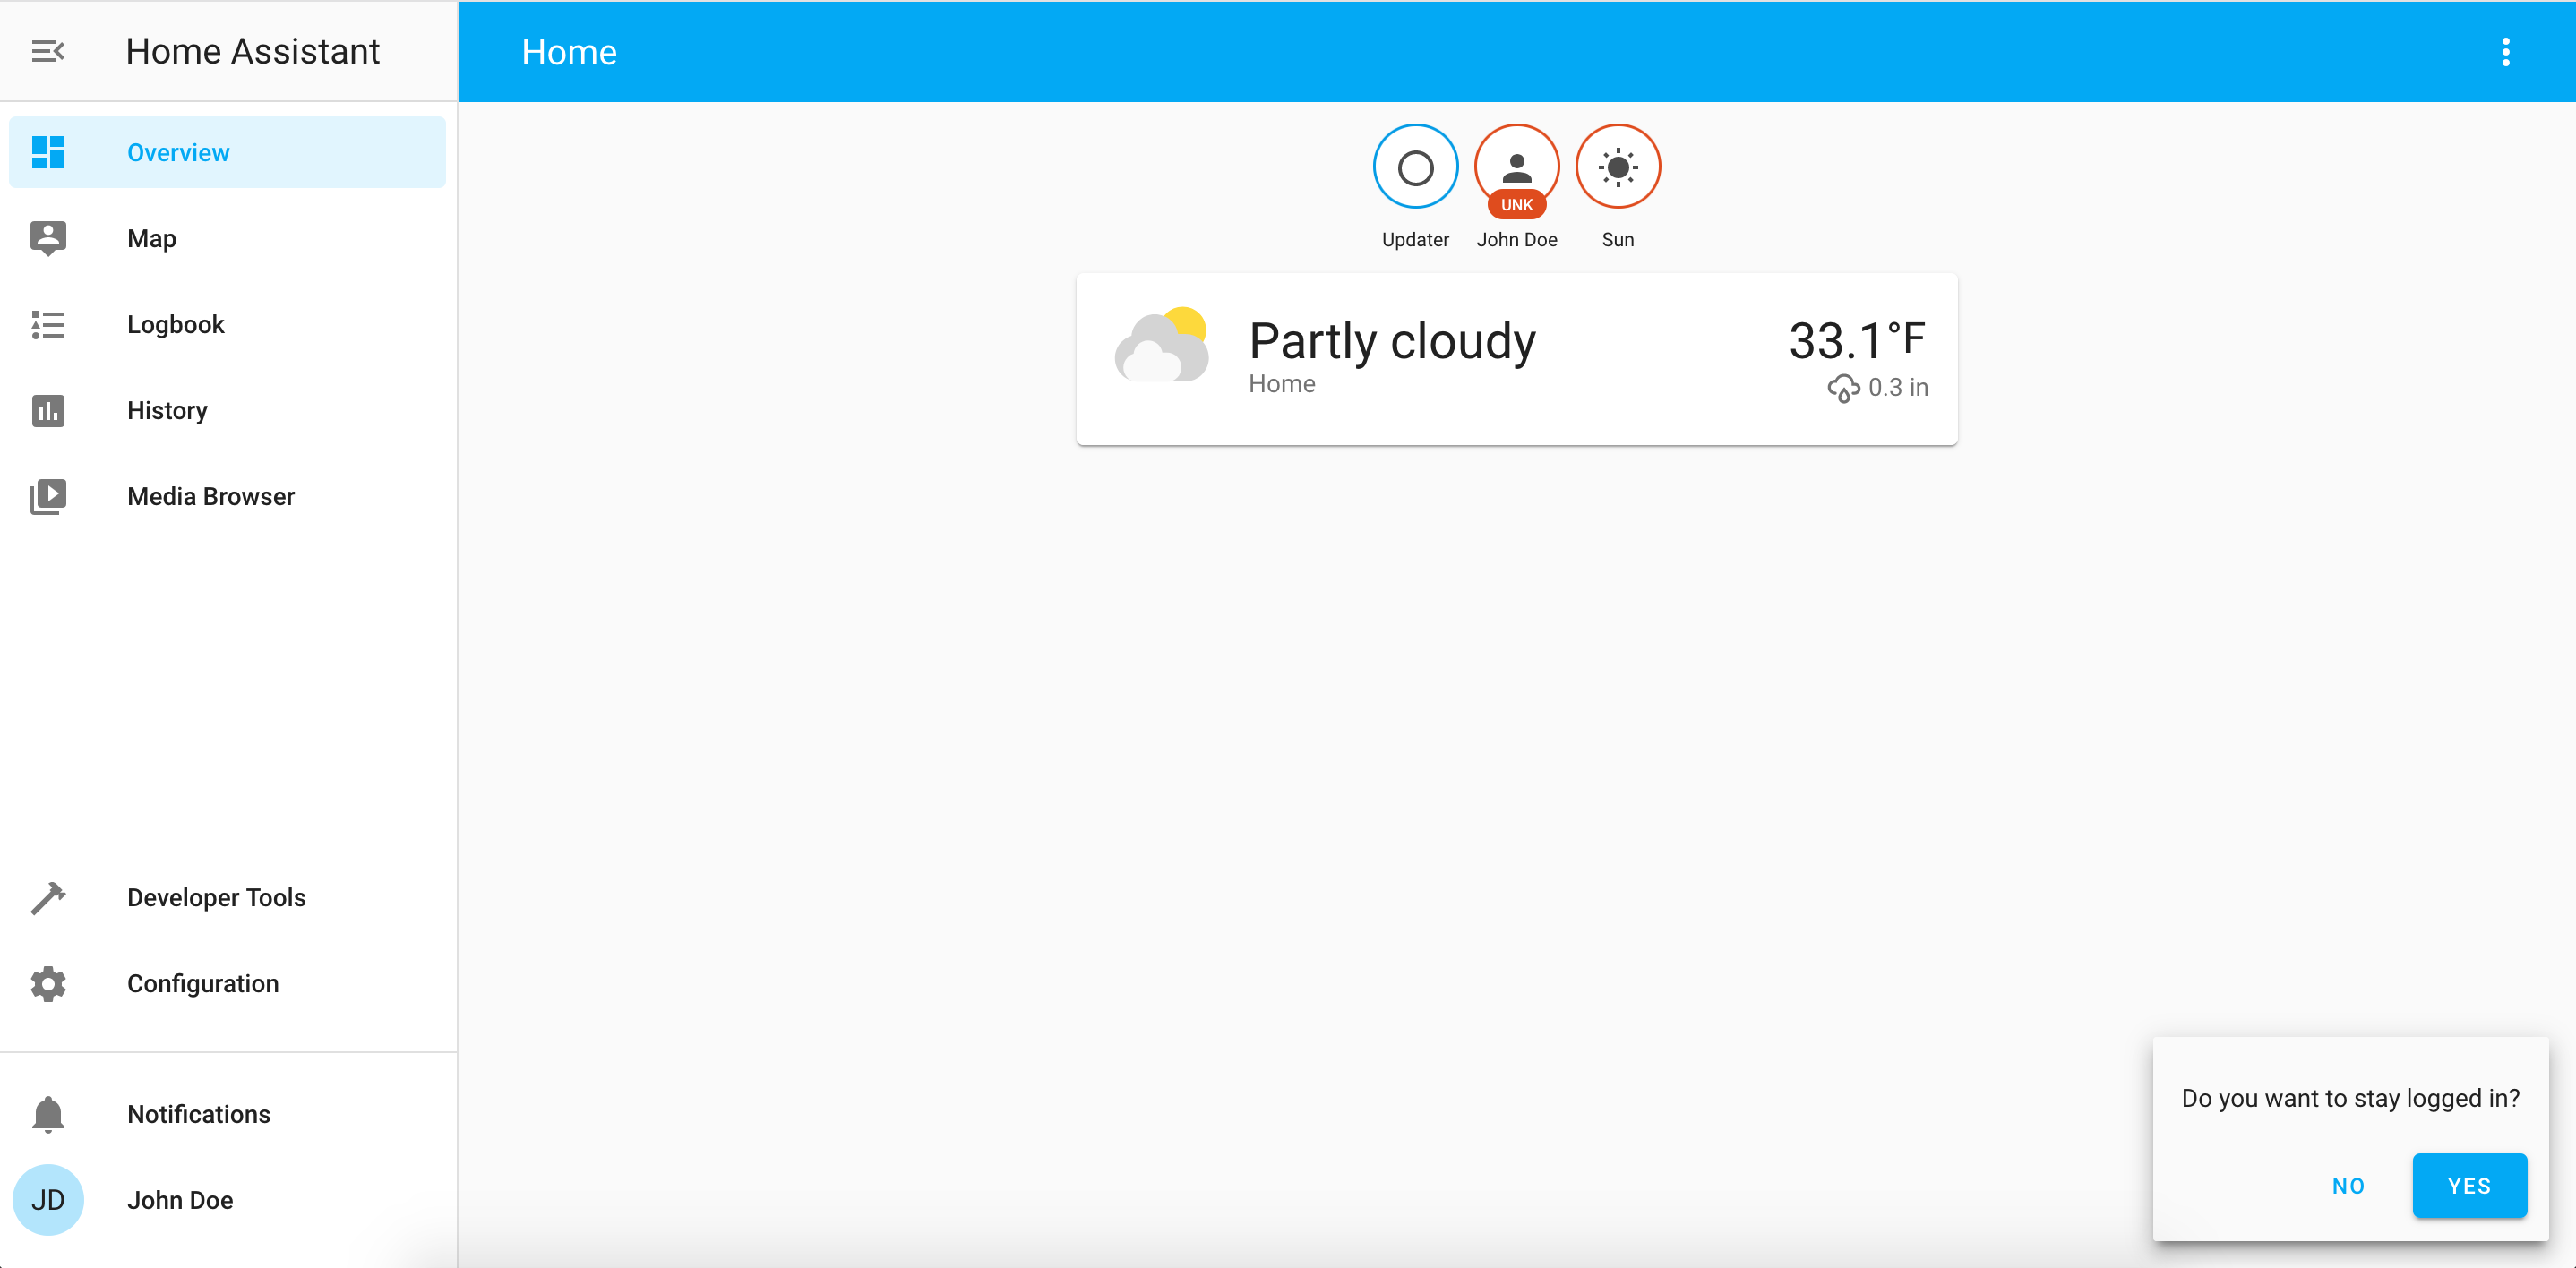
Next you’ll need to log into your Home Assistant, this will create a cookie for your mobile app so you can continue to access your HA remotely.
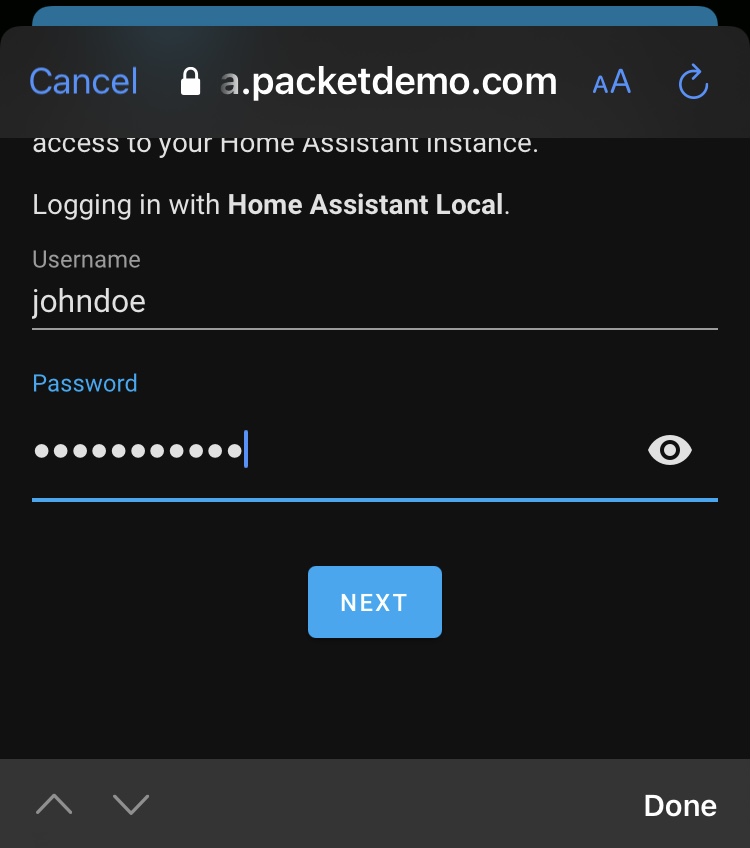
Home Assistant Login
You should be authenticated and able to log into and control your Home Assistant remotely!
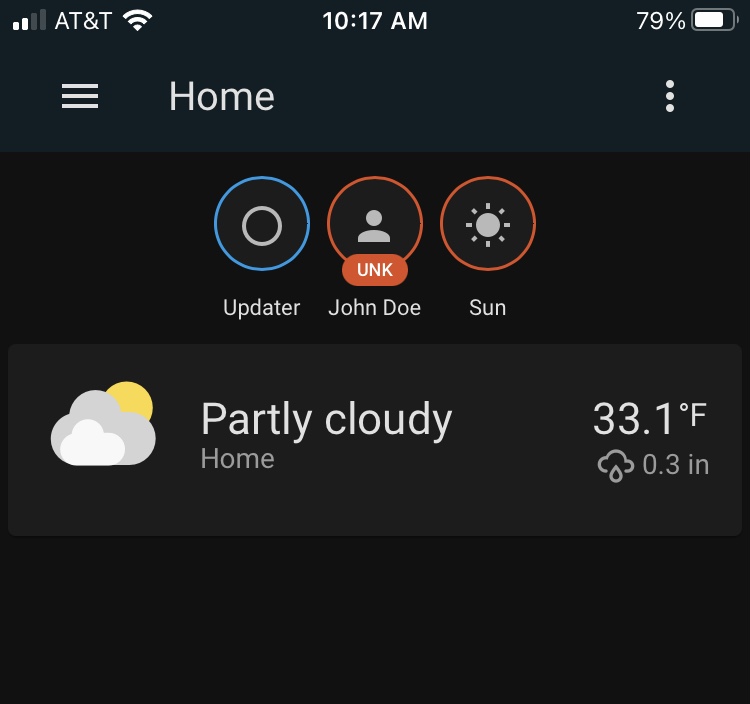
Mobile Dashboard
Software Updates
With this installation keeping up with software should be easy, this is because all of our application data for all of our containers (Home Assistant, Packetriot) is being stored on the host and not inside the container.
Below are commands you can run to refresh all the software for all of the containers.
[user@host ] cd ~/containers

# remove exisitng containers
[user@host:~/containers ] docker-compose down

# pull down updates
[user@host:~/containers ] docker pull packetriot/pktriot:latest
[user@host:~/containers ] docker pull homeassistant/home-assistant:stable

# recreate the containers
[user@host:~/containers ] docker-compose up -d
Security Improvements
I don’t run Home Assistant on my home network, I just haven’t jumped on the smart home bandwagon yet. However, if you’re installing and using smart devices in your home, HA is a very popular system to command and control them, and adds a lot of utility to your home. It can also make it easy to monitor these devices when you’re away from home.
That being said, I’d personally would want an extra layer of security. You can implement another layer easily by just adding password protection to the Home Assistant website via the Packetriot client. It would be added by just including the flag --password to the command we used to setup traffic rule for Home Assistant:
[user@host:~/containers ] docker exec -it home-assistant_pktriot-tunnel_1 \
	pktriot tunnel http add --domain ha.packetdemo.com \
	--letsencrypt --destination home-assistant --http 8123 \
	--password

Input password for session-based authorized traffic
Password:

HTTP/S traffic rule added
The password protection is session-based (uses cookies). What it would provide from a security perspective is to block any outsiders, e.g. search engines, bots, etc.. from just randomly visiting our domain and seeing that it’s a Home Assistant instance.
A user would have to authenticate here first before any traffic is even proxied to the Home Assistant service. This means that any automated traffic would just get dropped.
However, there is one critical downside to adding password-protection, it will break the mobile apps. The mobile apps are not expecting another authentication mechanism and this change would break them.
You can still visit your HA instance using a mobile web browser, so that would be a simple work-around if you’re okay with that.
Conclusion
I’m very impressed with the amount of plugins and devices Home Assistant supports. HA has an pretty awesome community as well. I think if you’re looking at home automation then Home Assistant is the right software to consider setting up and the eco-system is there to support any smart or IoT devices you setup in your home.
We did not cover all options and configurations for Home Assistant since it’s so expansive and depends on what devices you have on your network. However, we hope the help on setting it up along with the tunnel to access HA remotely will help some questions.
Please refer to the help resources available by Home Assistant and its community if you have more questions.
We hope you enjoyed this tutorial, please share if this was helpful and follow us on Twitter @packetriot for updates and notifications when we write another self-hosting tutorial.
Cheers!