Develop Anywhere with VS Code Server
Published at December 23, 2020 · 12 min read
Share on:This tutorial is inspired from this tweet by Tim Myer and the video he later posted. I’ve heard of code-server in the past but as a diehard Sublime user I haven’t made any attempts to expand past my normal setup and workflow. However, seeing this in action was impressive!
Tim setup a virtual machine on a cloud provider along with an HTTP/S server and TLS certificates. Altogether a lot of steps. We’ll be able to duplicate this setup quickly with a Packetriot tunnel and self-host code-server, along with any else we need or want, on our own equipment.
VS Code Server
VS Code Server, or just code-server, is what makes this possible. In this tutorial we’ll first set up a very simple configuration. Once you get a basic setup working I’m sure you’ll want to tweak or customize it.
For example, you might want to consider some file storage options for flexible and persistent storage that can be accessed by one or more code-server instances and your primary workstations. In addition, you might want to create your own code-server container images and load it up with tools or libraries for a specific project or to mirror your primary workstation.
There’s lot of opportunity for customizing how you want to host code-server. We’ll start with the basics that introduces all of the core applications required. Once that’s understood and working it’ll be easer to start customizing if you need it.
Security
Let’s touch on security upfront. Code-server is essentially VS Code running in a browser tab, which means you can create terminal sessions from the editor, potentially install new application, potentially run sudo… That’s a very powerful feature so we need to make sure code-server is protected from the rest of the Internet.
Code server enables password authentication by default but we’re going to substitute this mechanism with the password authentication portal that can be provided by the Packetriot client. The reasoning for this is:
- The password generated by code-server is random and not selected by the user, so a little inconvenient
- The password is stored in plain-text in the configuration directory
- The code server will be exposed to the Internet, the built-in auth is good but the rest of the web application can be poked and proded by the Internet, so there’s a concern with that
I’d rather have the password stored in a salted-hash. The Packetriot client has an authentication portal that can be added to any website it serves and a salted-hash is stored in the configuration.
This portal will prevent random bots or users on the Internet from discovering the URL, visiting and then identifying that the application we’re hosting is a VS Code Server.
The image we’re using, from linuxserver.io, includes support for sudo. We won’t be setting this up in our configuration. However, this would make installing new programs possible and is a convenience.
Personally, I’d rather build a customized image with code-server that already has all of my required tools and limit privileges inside the container, e.g. run as read-only and as non-privileged user.
These are all opinions. Needs and requirements will influence how one would customize their image. Either way, I think it’s worthwhile to bring up some of these concerns before diving into the rest of the tutorial. With that, let’s get started!
Code Server
Code-server has a container image that is prepared by the authors and is built using debian:10. There’s another container provided by the linuxserver.io project that is well maintained and is built using ubuntu:18
We’ll be using the container from linuxserver.io since it exposes some options we want to configure. We want to turn off auth in the code-server web app since we want to enforce authentication before any traffic is even proxied to it using the password portal in the Packetriot client.
I can see many users wanting to work in a base container that’s different, e.g. Centos, Fedora, Arch or others. We’ll discuss customizing the container later in a future tutorial that expands on this one.
Docker Compose File
Below is the compose file we’re going to use. We’re going to mount the /home/user/projects directory from our users’ home into the container. You can choose any other path on your host that makes the most sense. In this example, the ~/projects folder is the directory we are working out of on our workstation. We want it to be available in the container so that changes reflect in both places (container and host).
Substitute the timezone for the yours as well as the PUID and PGID. On Linux and Mac systems you can use the commands id -u and id -g to retrieve the UID and GID values for your user.
Docker for Windows uses SMB to map directories on the host into containers so these values aren’t really needed and so you can remove them from the compose file.
version: '2.1'

services:
  pktriot:
    image: packetriot/pktriot:latest
    restart: unless-stopped
    volumes:
      - ./pktriot:/data

  code-server:
    image: ghcr.io/linuxserver/code-server:latest
    restart: unless-stopped
    environment:
      - PUID=<replace>
      - PGID=<replace>
      - TZ=America/New_York
    volumes:
      - /home/<replace>/Projects/:/config/workspace
      - ./config:/config
Most of our tutorials follow the convention of creating a separate directory where the compose file docker-compose.yml is stored. Other sub-directories mounted into the container are sub-directories. In this instance, we’re going to break with that by mounting the ~/projects directory in the code-server container and not exclusively use sub-directories to store container data.
We’ll be following our usual convention here and named our primary directory containers. You can use any name you want.
For users that follow our other tutorials, you can most likely reuse the code-server block in this compose file with a set of containers you’re managing in an existing compose file.
Use your favorite editor to create and save the docker-compose.yml in the containers directory.
[user@host ] mkdir containers
[user@host ] cd containers

[user@host:~/containers ] vim docker-compose.yml
Next we want create both of these containers.
[user@host:~/containers ] docker-compose up -d
Creating network "code-server_default" with the default driver
Pulling code-server (codercom/code-server:latest)...
latest: Pulling from codercom/code-server
...
b64b4858c46f: Pull complete
Digest: sha256:f7cafd0d562e97f4993ea08c06ee328cbd91f8dbcc955cd5ce497d8da82d7c38
Status: Downloaded newer image for codercom/code-server:latest
Creating code-server_pktriot_1     ... done
Creating code-server_code-server_1 ... done
Both of the containers have been created, however, we need to configure the tunnel in the code-server_pktriot_1 container before being able to access it remotely. Be sure to make a note of the name of the code-server container, since we will use that as the destination (hostname) to the container.
Access Code Server Remotely
To access code-server remotely we’ll setup a Packetriot tunnel that will expose it to the Internet but also shield it with an authentication portal.
We are going to use a custom domain in our tutorial. If you’re doing the same, be sure to verify it prior to continuing along. Using a custom domain allows us to setup certificates using Let’s Encrypt, this puts the private keys and certificates in your control.
It is possible to use the hostname, e.g. awesome-tunnel-123.pktriot.net, that is assigned to a tunnel. The hostname is conveniently stable but it uses the *.pktriot.net wildcard certificate and won’t provide the end-to-end encryption that may be desired. However, using it will make running through this tutorial potentially faster if you’re just interested in seeing how a hosted code-server works.
Change into the containers directory. We’ll use the command docker exec -it to execute a command inside the code-server_pktriot_1 container to configure a new tunnel. The flag -it is critical since we will be inputting information during the configuration steps.
[user@host:~/containers ] docker exec -it code-server_pktriot_1 pktriot configure
Choose a path to the configuration file:
[1] /etc/pktriot/config.json
[2] /data/config.json
[3] /root/.pktriot/config.json

Input selection [#]: 2
Choose option [2] to store the configuration in /data/config.json. This file will be available on your host in the path ~/containers/pktriot/config.json.
Be sure to chose a region that is closest to you geographically.
Authenticate client with login credentials. Created account w/Google SSO? Use --url with 'configure'.

Email: user@email.com
Password:
Authenticated!

Choose the region for the edge server to connect to:
+------------------------+
| #   | Region           |
+------------------------+
| 1   | us-east          |
+------------------------+
| 2   | us-west          |
+------------------------+
| 3   | eu-central       |
+------------------------+
| 4   | asia-southeast   |
+------------------------+
| 5   | australia        |
+------------------------+
| 6   | us-south         |
+------------------------+
| 7   | asia-south       |
+------------------------+
| 8   | africa-south     |
+------------------------+

Input selection [#]: 1

Tunnel configuration:
  Hostname: muddy-leaf-16000.pktriot.net
  Server: us-east-63815.packetriot.net
  IPv4: 138.197.66.62
  IPv6: 2604:a880:800:a1::dc:f001

Start the tunnel and visit URL to check its working:
  pktriot --config /data/config.json start
  https://muddy-leaf-16000.pktriot.net

Detailed help and step-by-step tutorials:
  https://packetriot.com/docs
  https://packetriot.com/tutorials.

Need more support?
  Email: support@packetriot.com
  Twitter: @packetriot (please follow us, we like new friends :)
Make a note of the IPv4/v6 address of the Packetriot server this tunnel was assigned to. This assignment will not change and we can use the IP addresses to setup DNS A records for our custom domain. We can also use the hostname muddy-leaf-16000.pktriot.net assigned to our tunnel for creating CNAME records.
We’re going to use the custom domain code.packetdemo.com. Setting up an A or CNAME will work for creating DNS records for our custom domain. This step is critical before creating our HTTP/S traffic rule DNS is used by Let’s Encrypt to generate TLS certificates for our Home Assistant tunnel.
Once DNS is setup correctly we can add a new HTTP/S traffic rule to our tunnel configuration. We’ll enable Let’s Encrypt which automatically enables secure redirect. This will redirect all client traffic to HTTPS.
The destination we will use code-server. This is the name of the container from the compose file and Docker will resolve the name code-server to the virtual IP assigned to the container. In the case the containers’ IP changes, which happens, we won’t need to update our configuration.
The listening port for code-server is 8080 so we will proxy traffic there.
[user@host:~/containers ] docker exec -it code-server_pktriot_1 \
	pktriot tunnel http add --domain code.packetdemo.com \
	--letsencrypt --destination code-server --http 8080 \
	--password

HTTP/S traffic rule added
Restart our tunnel so that the new rule is loaded. Note, it will take our 60-90 seconds for the TLS certificates to be generated. When they are available you’ll see a table printed out with more details.
Note, if the DNS records are not correctly setup for a domain that is configured with Let’s Encrypt, recent revisions of the Packetriot client will check and print out a warning. Be sure to inspect the output from the tunnel container if you’re having issues.
If your configuration is incorrect and is left in that state, Let’s Encrypt will throttle requests for the domain. It will take hours before they will accept new requests for certificates after making the DNS record corrections.
[user@host:~/containers ] docker restart code-server_pktriot_1

[user@host:~/containers ] docker logs -f code-server_pktriot_1
Local server listening on http:80, https:443

Connecting to us-east-63815.packetriot.net...

Running HTTP services:
+------------------------------------------------------------------------------------------------------------+
| Domain                | Destination                 | HTTP   | TLS   | Secure   | Protect    | Site Root   |
+------------------------------------------------------------------------------------------------------------+
| code.packetdemo.com   | code-server_code-server_1   | 8080   | 0     | true     | Password   | --          |
+------------------------------------------------------------------------------------------------------------+

Certificates from Let's Encrypt are loaded asynchronously, please be patient (<90s) when initializing new domains.

+-----------------------------------------------------------+
| Certificate Domain    | Status      | Expiration          |
+-----------------------------------------------------------+
| code.packetdemo.com   | Available   | Mar 28 16:50 2021   |
+-----------------------------------------------------------+
Our tunnel is configured to serve requests to our code-server using TLS from Let’s Encrypt and is password-protected. Let’s visit our instance by inputting the URL into any browser. In our case we’llbe visiting https://code.packetdemo.com in our browser.
You’ll be presented with an authentication page, use the password you input earlier when creating the HTTP/S traffic rule for code-server.
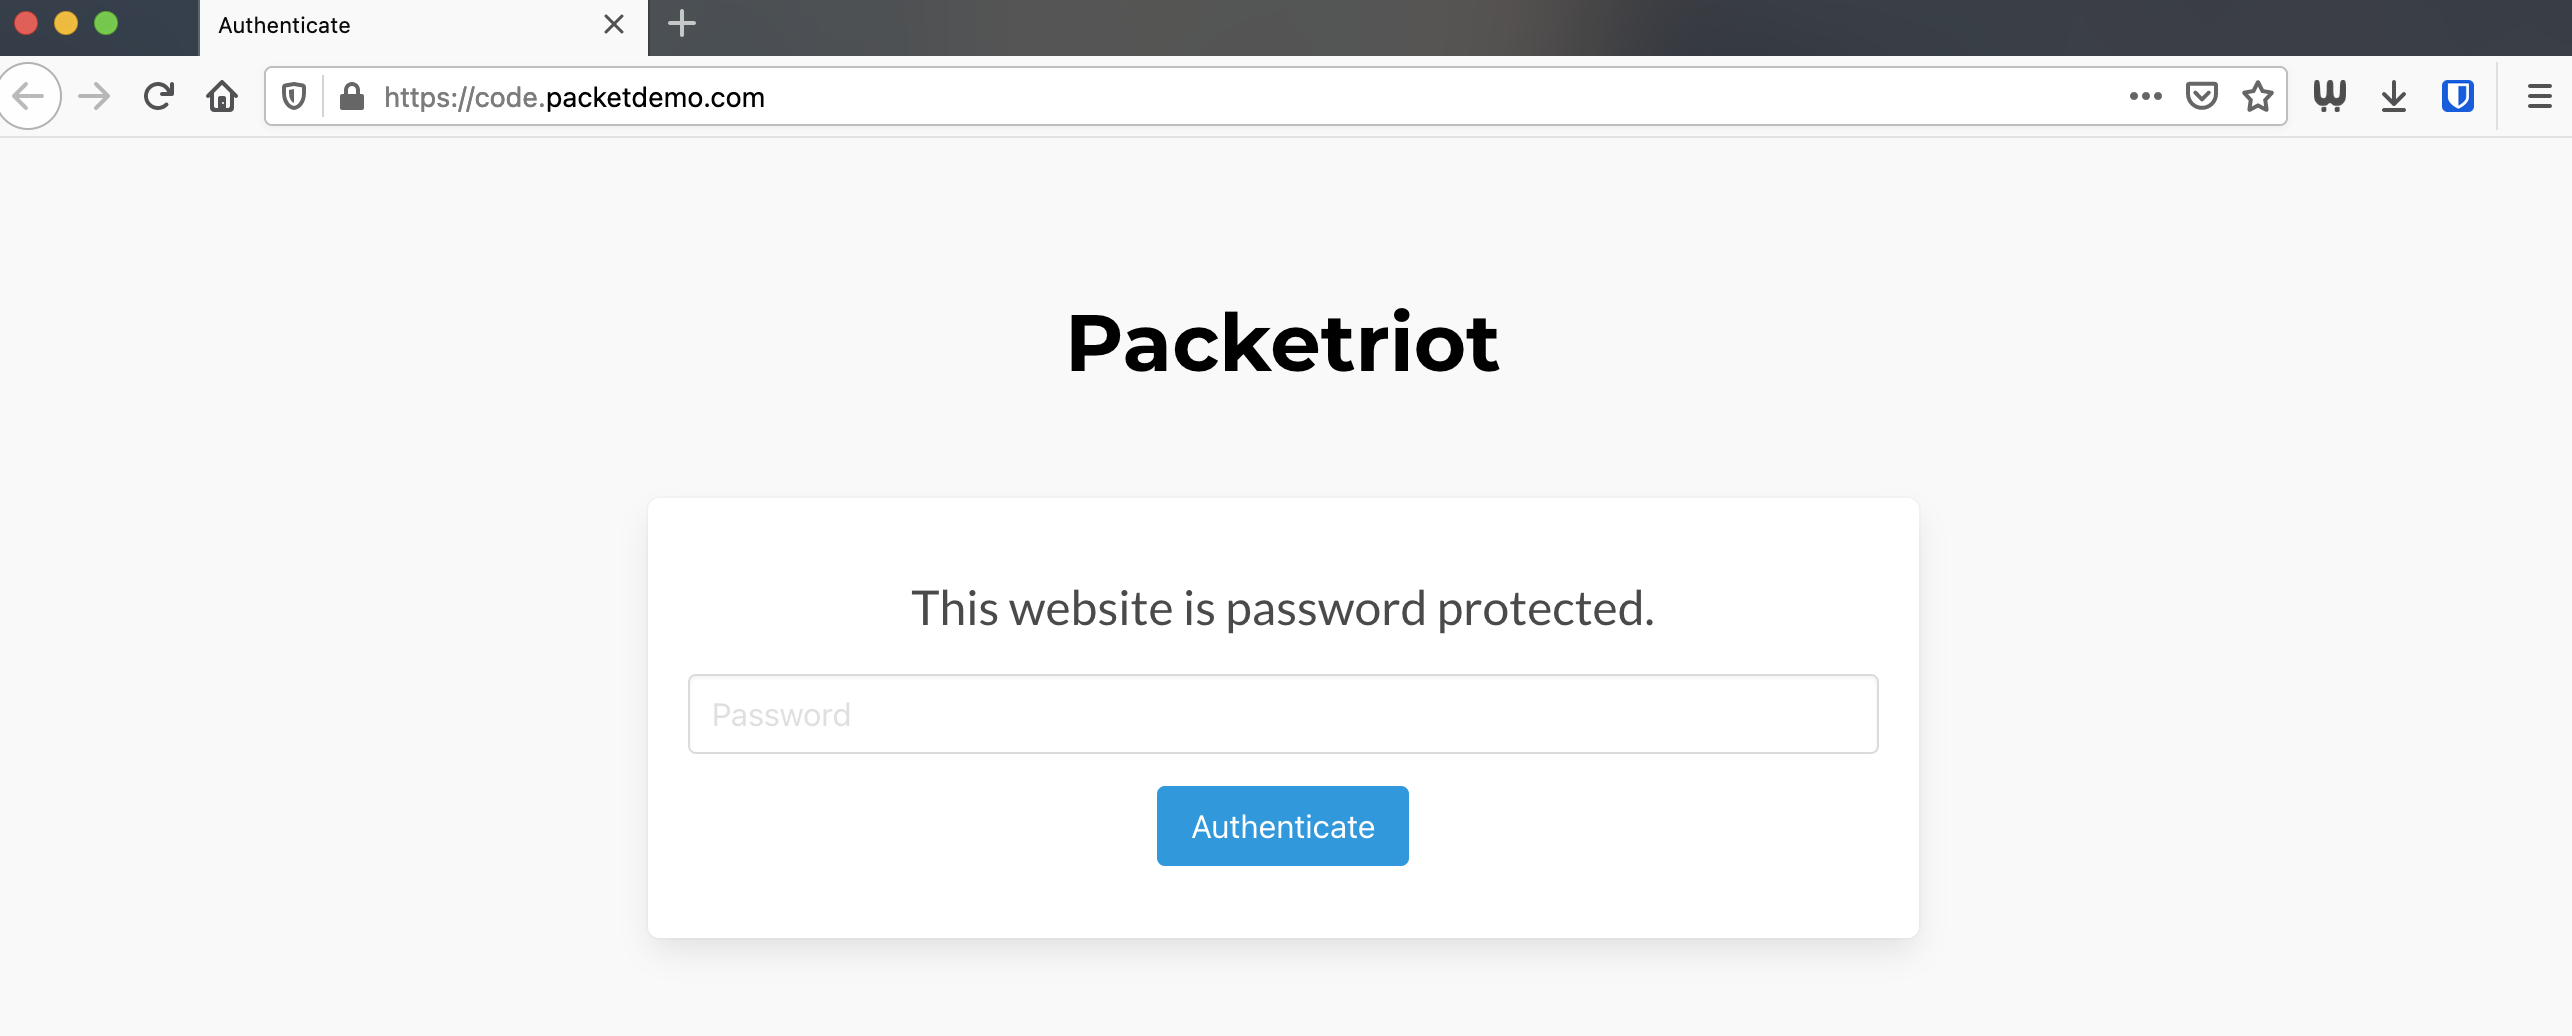
Packetriot Authentication Portal
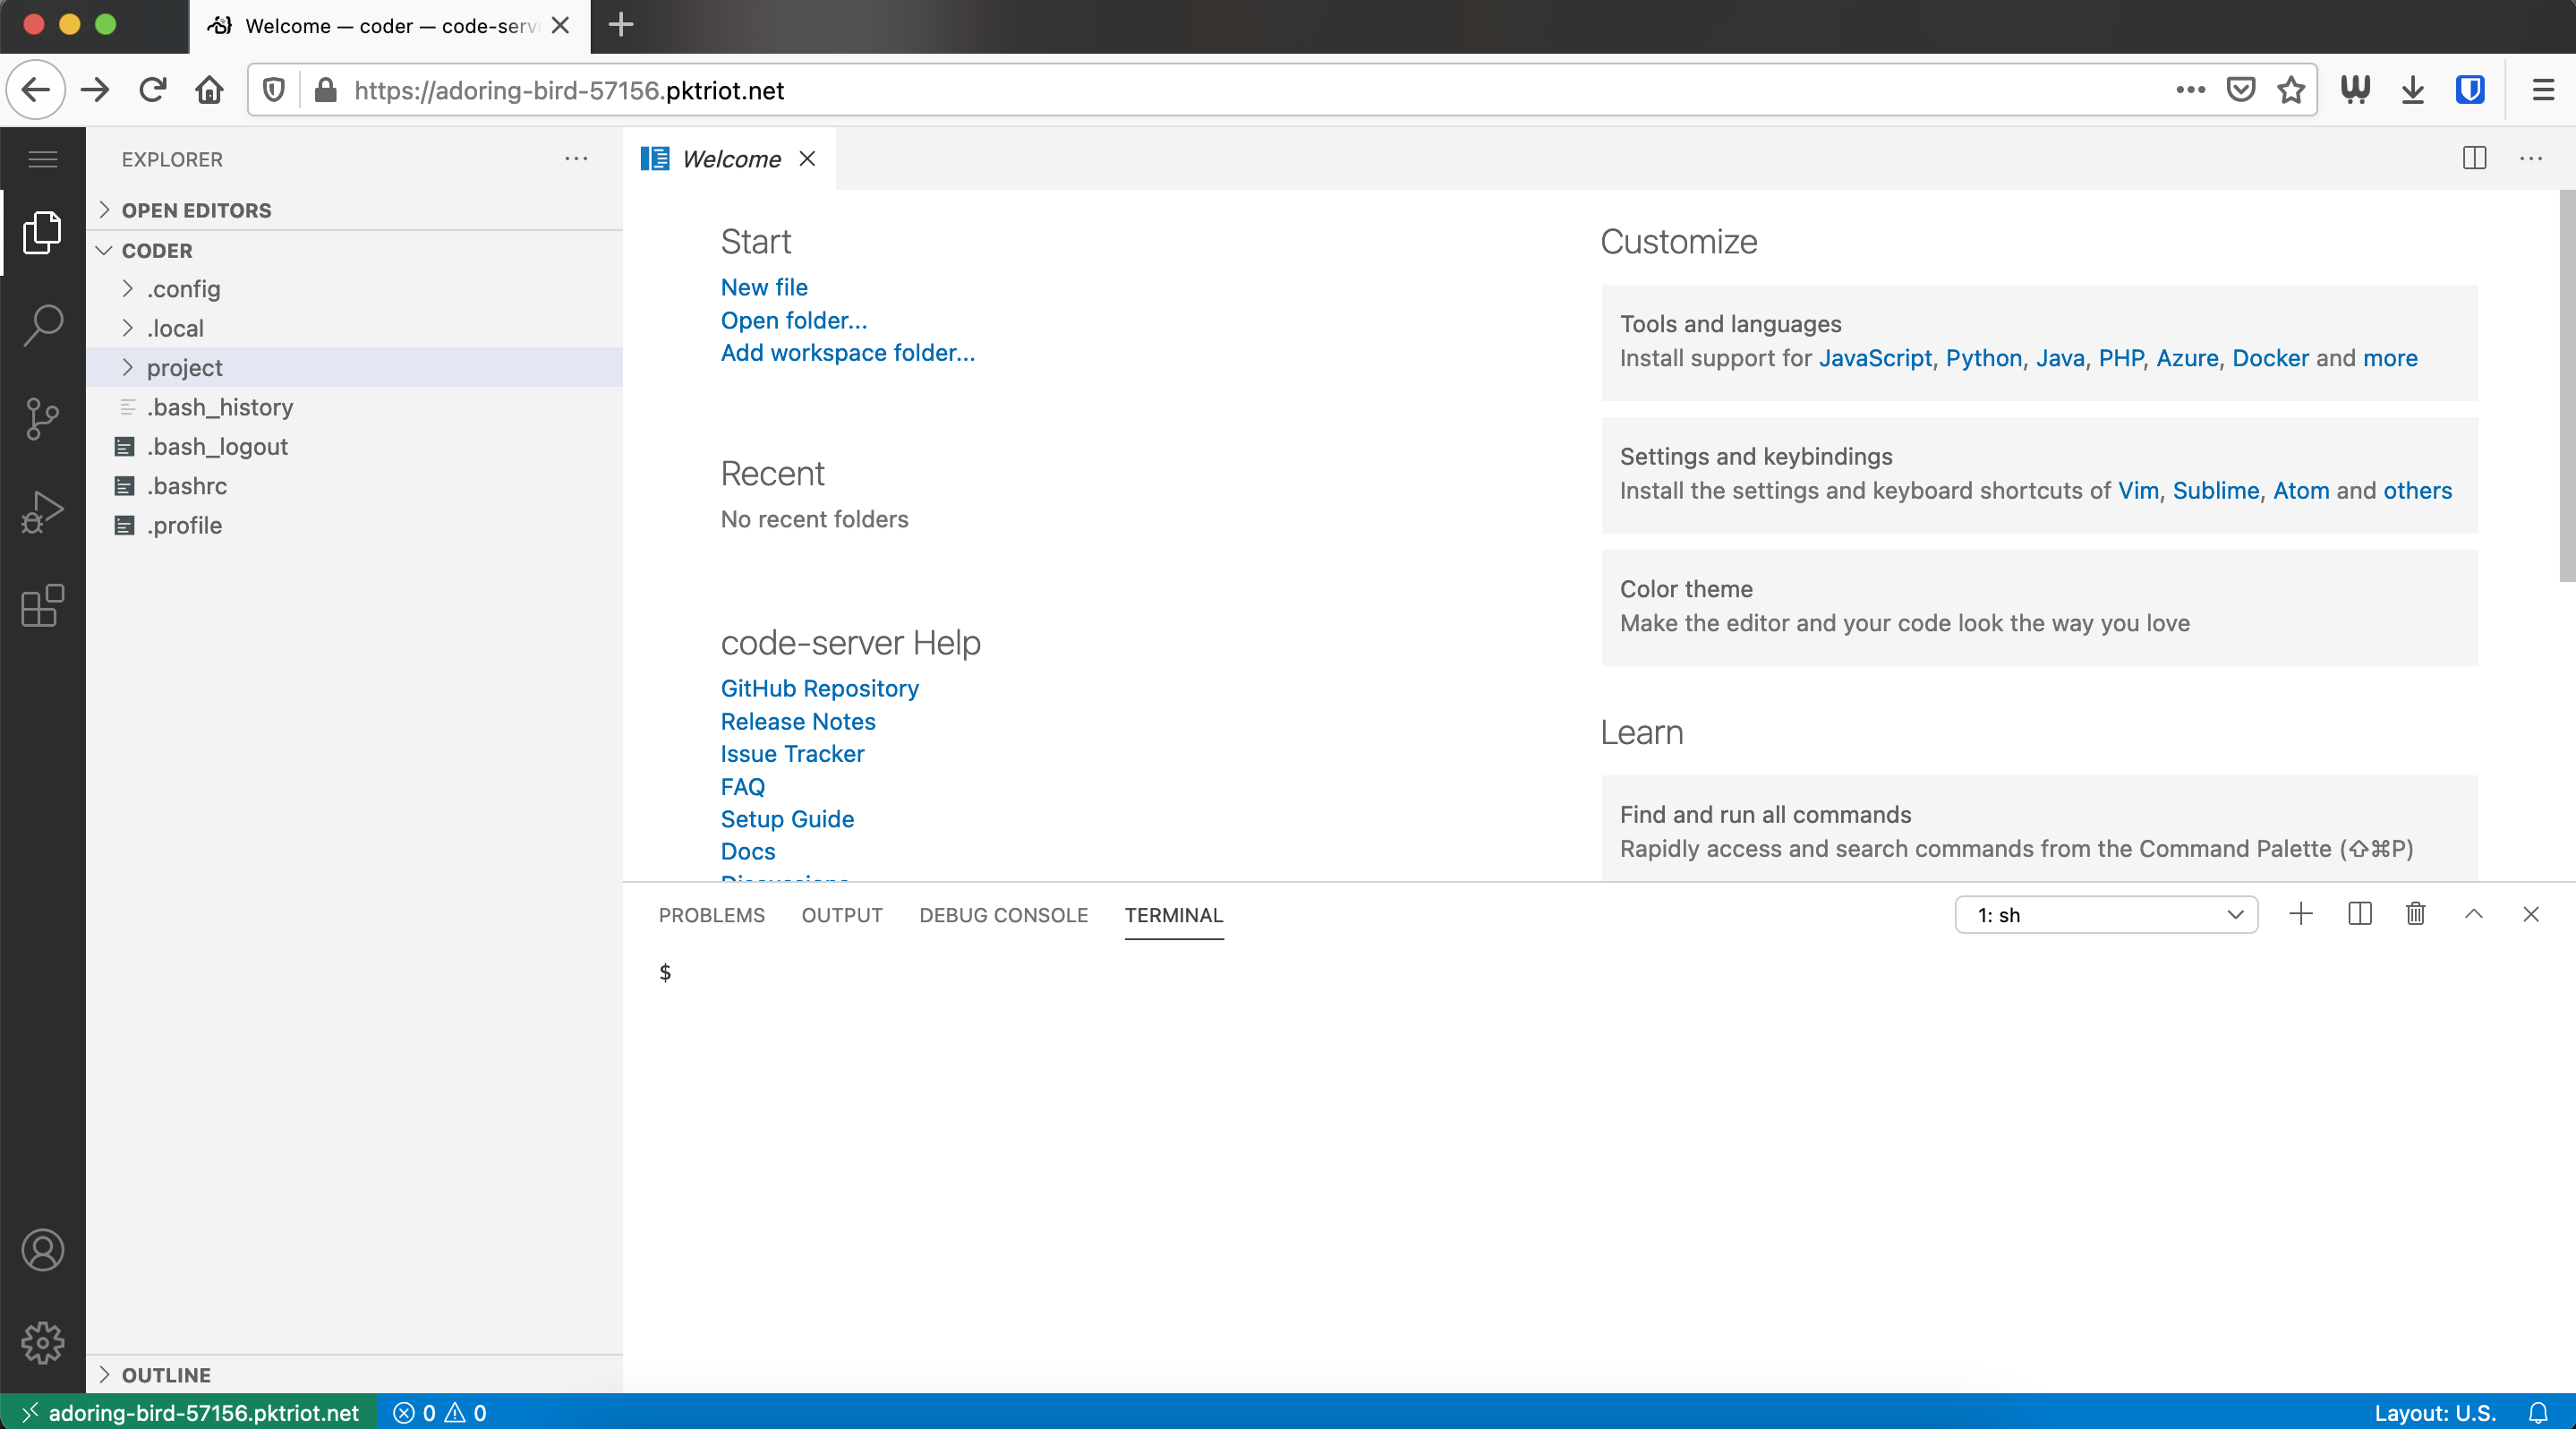
Once authenticated you’ll be redirected to the original URL requested or the welcome page for code-server. Authentication is maintained with a web session (cookies) that will expired in 24 hours.
If this is your first time using code-server in a browser get ready to be impressed. This editor functions and is as responsive as the VS Code editor you would run normally on your workstation.
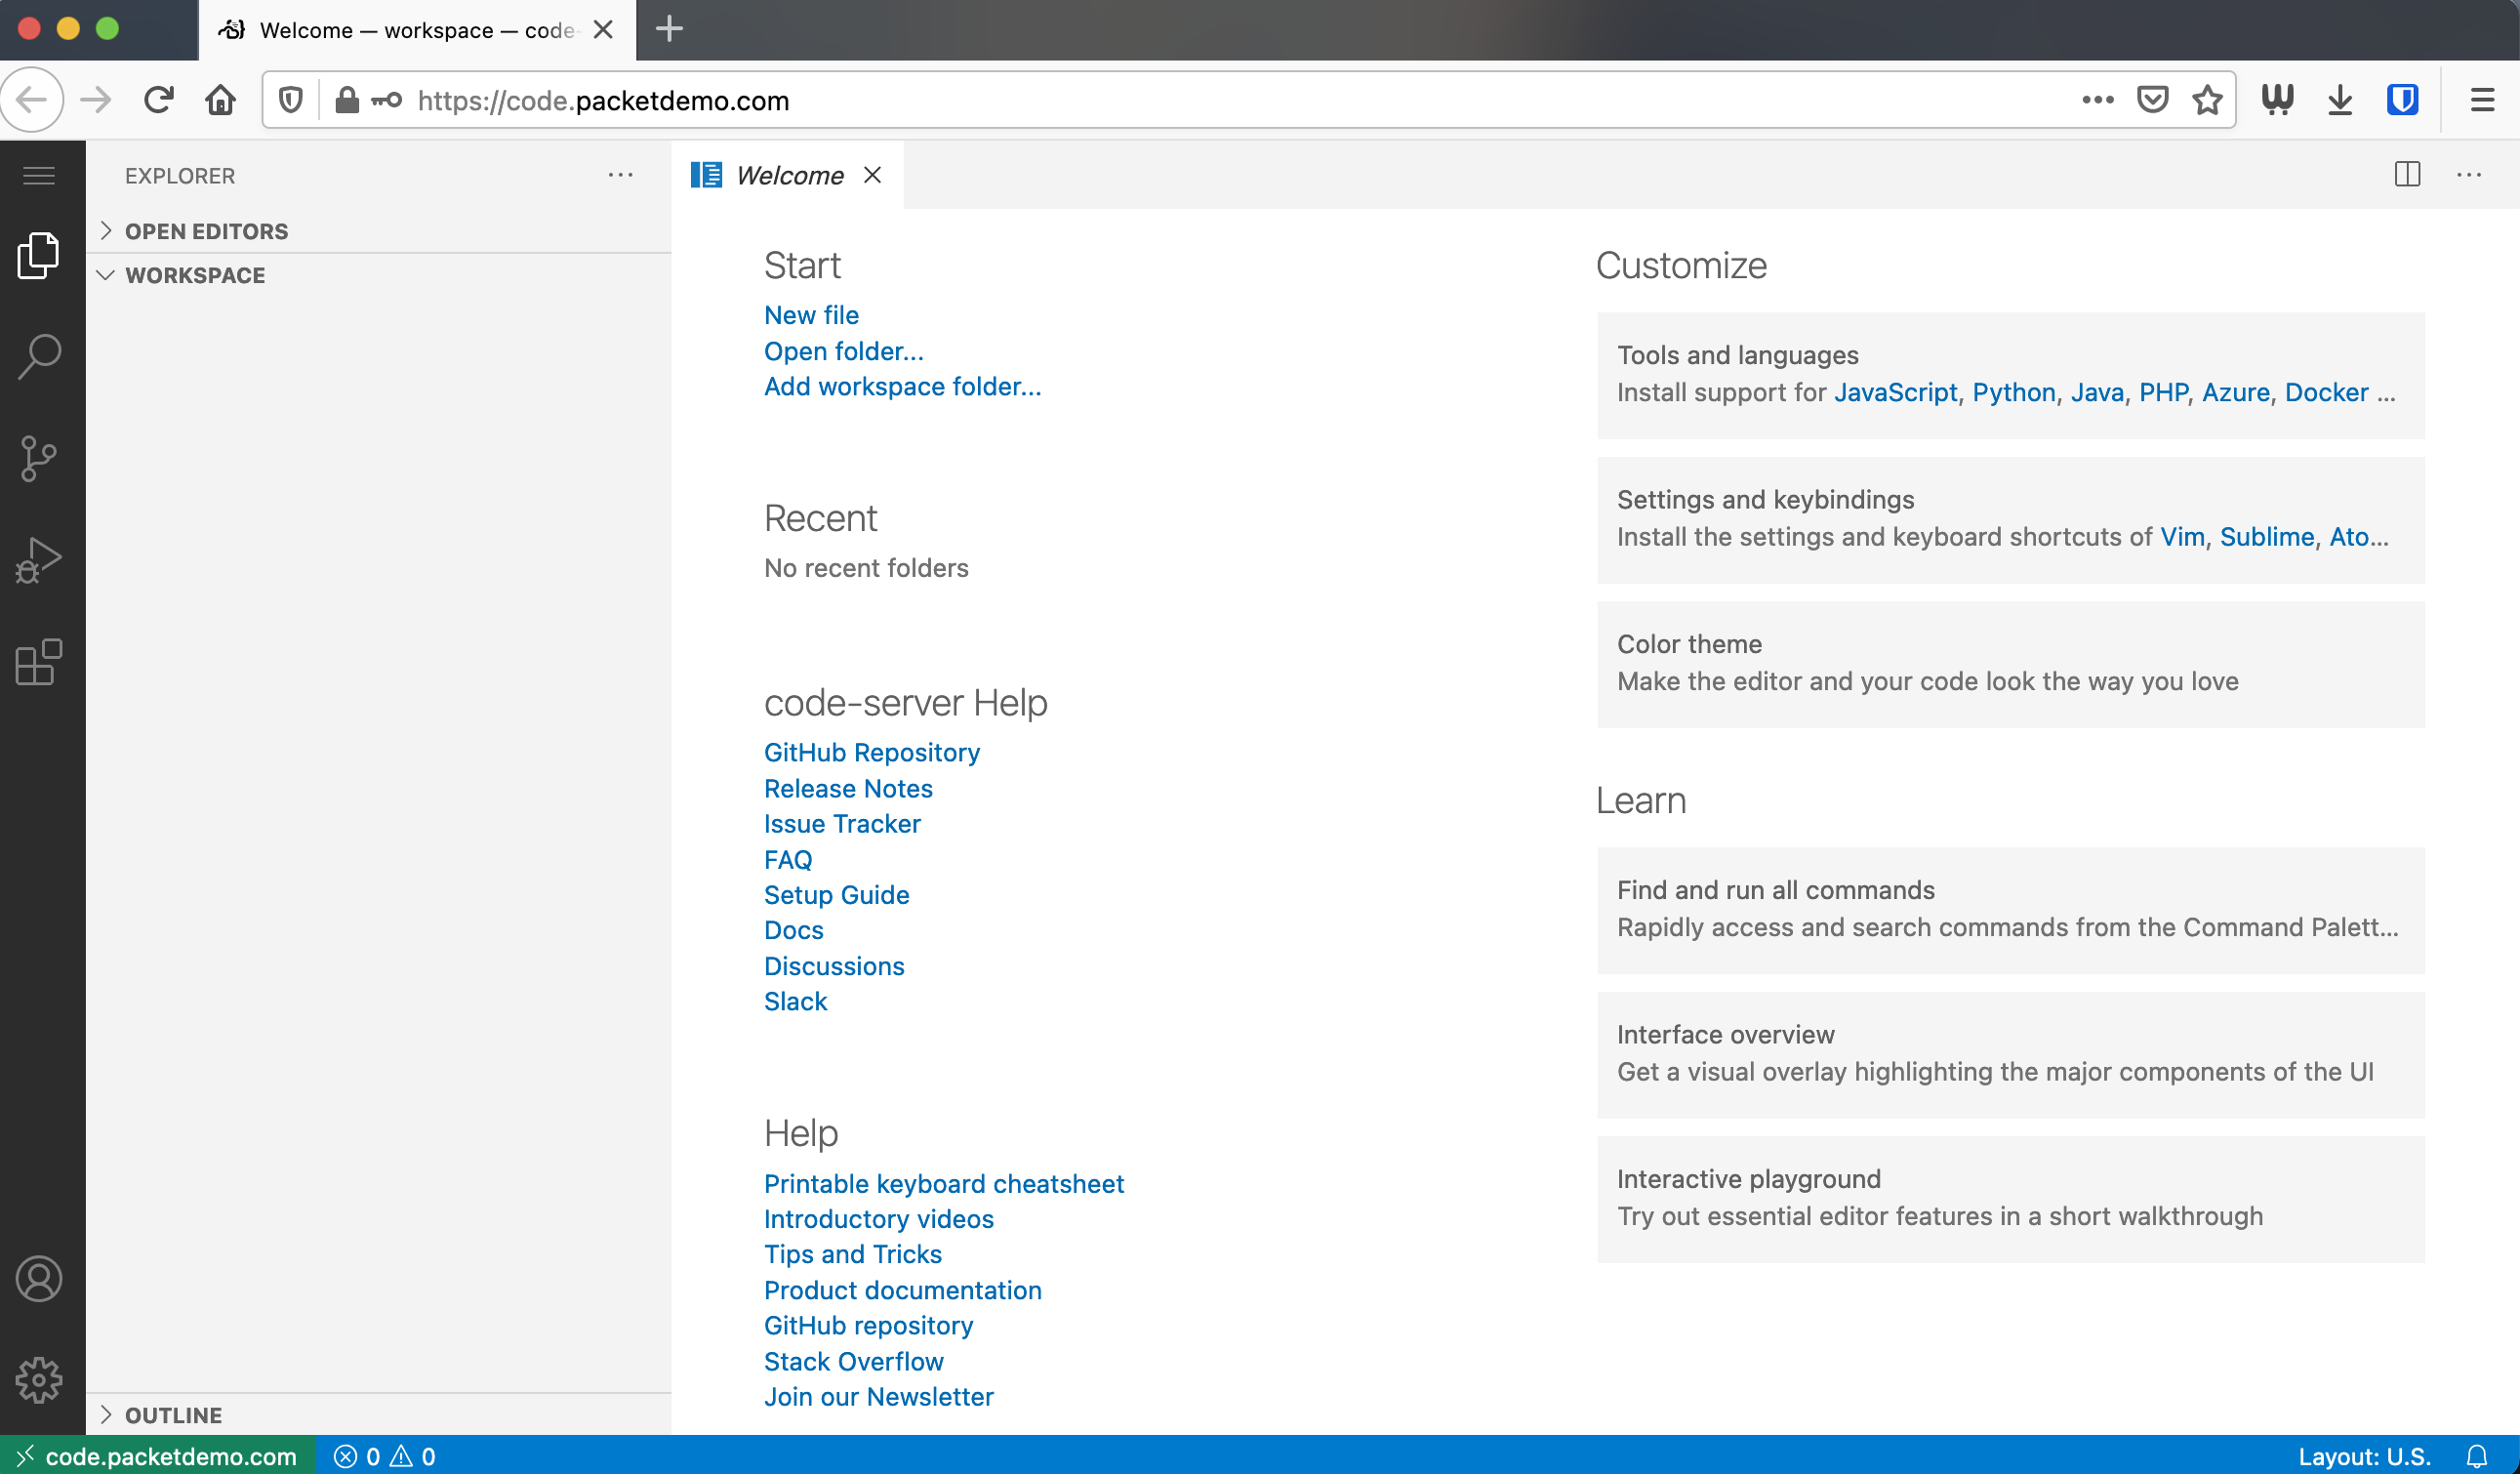
VS Code Welcome Page
Our code-server instance is now online and protected with by an authentication portal I guess it’s time to go back to real work… but more than likely it’s time to start customizing VS Code, choosing a syntax and color theme, and installing some favorite plugins.
Software Updates
With this installation keeping up with software should be easy, this is because all of our application data for all of our containers (VS Code Server, Packetriot) is being stored on the host and not inside the container.
Below are commands you can run to refresh all the software for all of the containers.
[user@host ] cd ~/containers

# remove exisitng containers
[user@host:~/containers ] docker-compose down

# pull down updates
[user@host:~/containers ] docker pull packetriot/pktriot:latest
[user@host:~/containers ] docker pull ghcr.io/linuxserver/code-server:latest

# recreate the containers
[user@host:~/containers ] docker-compose up -d
Conclusion
Please feel free to contact us if you have any questions or run into any trouble, we’ll do our best to help :)
Hosting a code-server instance is a pretty sweet. When I begin traveling again I can definitely see myself using this. I sometimes travel with more than one laptop because I’m just keeping projects/work separate. Having code-server and an environment I can edit, build and publish code with will save me that trouble. You can basically work from any computer with browser.
You can setup more than one code-server instance. In case you have multiple projects, or several clients, you can just spin up more instances of code-server and add more HTTP/S traffic rules to host them. One tunnel can host any number of web sites or services behind it.
We hope you enjoyed this tutorial. We’re planning on following up this tutorial to share some examples of how I would customize this more. I would setup a remote file-system, Samba or NFS, mounted into the containers. I would also customize the containers to mirror the environment, Centos 8, that I normally use.
If you’re interested in customizations and more complex configurations with code-server please reach out and let me know.
Thanks for checking our tutorial! We invite you to follow us on Twitter @packetriot for updates and notifications when we write another self-hosting tutorial.
Cheers!