Access Plex From Anywhere
Published at January 19, 2020 · 7 min read
Share on:I recently helped a user with setting up some traffic rules to access Plex remotely. While we worked together on setting it up he explained that a lot of Plex users want to do the same but there’s all kinds of barriers to setting it up. So I thought, let’s write a tutorial.
Plex manages your music, movies, photos and media.
TLDR;
Already a Packetriot and Plex ninja? Here’s the short version:
- Allocate a TCP port with the Packetriot client
- pktriot tunnel tcp allocate
- Create two traffic rules
pktriot tunnel tcp forward --port <port allocated> --destination <plex server ip> --dstport 32400pktriot tunnel http add --domain <tunnel hostname> --destination <plex server ip> --http 32400- Restart the Packetriot client
- Add new Custom Access URLs Plex:
https://<tunnel hostname>https://<tunnel hostname>:<port allocated>https://<server ip>:<port allocated>- Restart the Plex server
Let’s Get Started
Plex can sometimes be exposed by making changes to your home router, it will even try to set that up automatically via UPnP. This doesn’t always work and didn’t work for me when I tried it out.
Another issue, which can’t be helped at all, is if the ISP you receive service from uses Carrier-Grade NAT (CG-NAT). This was my users’ problem and there is no way around it. Carrier-Grade NAT is much like the NAT utilized on your router except there is a separate address space (100.64.0.0/10) to handle the millions of customers on that ISP network.
Quick Plex Installation
Let me first state that this isn’t a tutorial for setting up Plex. I’m not really a Plex user, although, after writing this walkthrough I saw how much better it is then the sets of applications I currently use for streaming my music collection.
For this walkthrough we’ll quickly setup up Plex using Docker and docker-compose. We want to focus on the traffic rules for your Packetriot client and configuration changes we make to Plex.
I took the compose file from Plex and updated it a bit. I added a separate network for Plex and a container for the Packetriot client. You can setup Packetriot on your system in several different ways, especially if you’re an advanced user.
Using Docker compose defines the entire environment in one place which simplifies our walkthrough and we can focus on traffic rules.
Below is our compose file. When I worked with compose I tend to make a directory for the system of containers, e.g. mkdir -p ~/containers/plex. I put my docker-compose.yml in here and when I define the volumes that are mounted into the container, I specify them to exist in here as well. These are just my conventions.
version: '2'

networks:
    plex:
        external: false

services:
  tunnel:
    container_name: pktriot_plex
    image: packetriot/pktriot:latest
    networks:
      - plex
    restart: unless-stopped
    volumes:
      - ./volumes/pktriot:/data

  plex:
    container_name: plex
    image: plexinc/pms-docker
    networks:
      - plex
    restart: unless-stopped
    ports:
      - 32400:32400/tcp
      - 3005:3005/tcp
      - 8324:8324/tcp
      - 32469:32469/tcp
      - 1900:1900/udp
      - 32410:32410/udp
      - 32412:32412/udp
      - 32413:32413/udp
      - 32414:32414/udp
    environment:
      - TZ=America/New_York
    hostname: mediaserver
    volumes:
      - ./volumes/config:/config
      - ./volumes/transcode:/transcode
      - ./volumes/data:/data
You use the command docker-compose up -d and it will create a new network, pull down the images for Plex and the Packetriot client. It will setup the volumes, expose the ports and start up the containers.
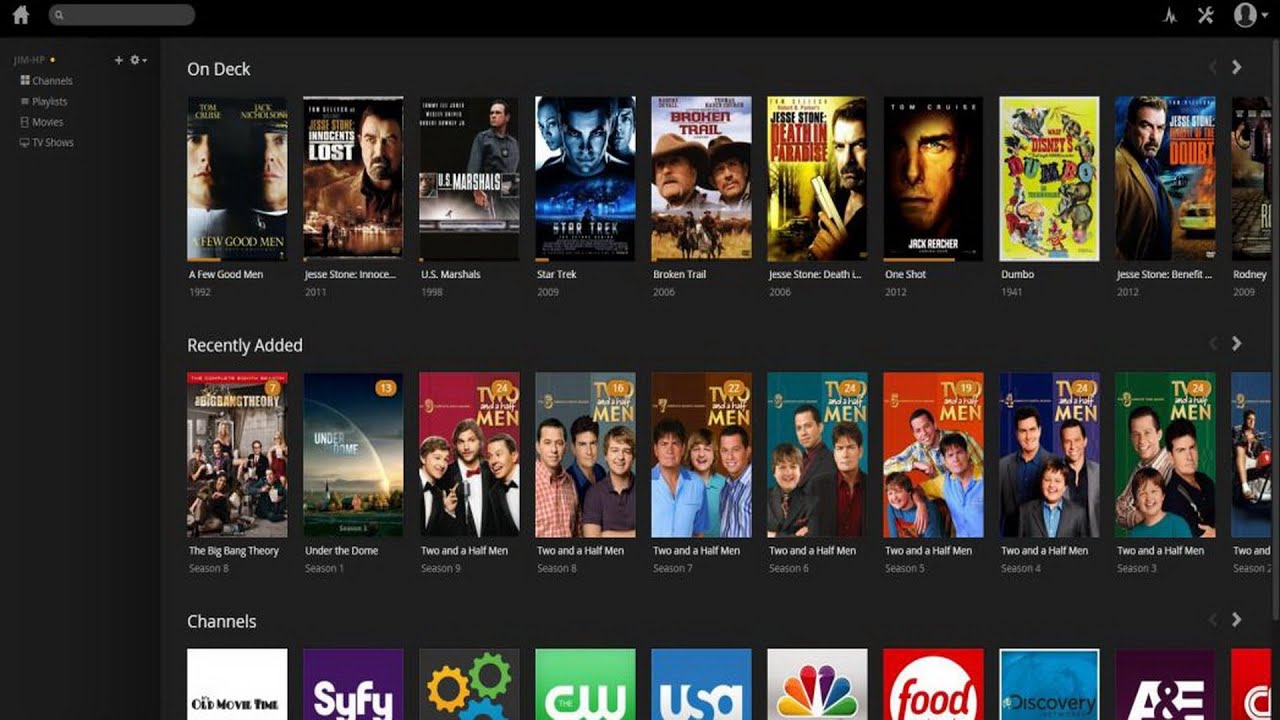
Once all of the containers are built, visit http://127.0.0.1:32400/web in your browser. You should be at the welcome screen. Create a new Plex account or log into your existing account.
Plex Welcome Page.
If this is a fresh installation for you, you’ll walk through a wizard that enable you to use the automatic (UPnP) mechanism to open up ports on your router. Feel free to try it out, but we’re assuming this option will not work for you.
Routing Traffic to Plex
Your Packetriot client is running as a container and is named pktriot_plex. We’ll need to configure this tunnel first with the following command:
docker exec -it pktriot_plex pktriot configure --login
We’ll use the --login method to quickly setup the client. Choose a region that is generally close where you would be accessing your Plex Media Server. Since this is a streaming service you want low latency.
Let’s print out the tunnel details and allocate a TCP port.
docker exec pktriot_plex pktriot info
Client:
	Hostname: reverent-meadow-17648.pktriot.net
	Server: us-east-65319.packetriot.net
	IP: 159.203.126.35

docker exec pktriot_plex pktriot tunnel tcp allocate
Allocated port 22213
We’re going to setup an HTTPS traffic rule using the hostname we were assigned and the TCP port that we allocated. Our rules are going to route traffic from the Internet to the Plex container listening on port 32400. However, and this is a nuance that advance Plex users will probably understand right away, if we set the security to tighter restrictions then only our TCP routing will work correctly. We’ll explore exactly why later.
Use the following commands to create the rules we need, we’ll be creating an HTTPS and TCP rule.
docker -it exec pktriot_plex pktriot tunnel http add --domain reverent-meadow-17648.pktriot.net --destination plex --http 32400

docker -it exec pktriot_plex pktriot tunnel tcp forward --port 22213 --destination plex --dstport 32400
Note, I used the hostnames, plex, for the destinations. Docker will resolve the container names to the correct IP addresses each container is assigned. Since IPs for a container can change, this is the best way to setup the rule so we don’t need to worry about updating destination IPs for our rules.
That’s it, let’s restart our container and verify our rules accept by the server connect to.
docker restart pktriot_plex

docker logs pktriot_plex
Connecting...

Running HTTP services:
+------------------------------------------------------------------------------------------------------------+
| Domain                              | Destination   | HTTP    | TLS   | Secure   | Protect   | Site Root   |
+------------------------------------------------------------------------------------------------------------+
| reverent-meadow-17648.pktriot.net   | plex          | 32400   | 0     | true     |           | --          |
+------------------------------------------------------------------------------------------------------------+
Running TCP services:
+---------------------------------------+
| Port    | Destination   | Dest Port   |
+---------------------------------------+
| 22213   | plex          | 32400       |
+---------------------------------------+
Update Plex with New Access URLs
The following URLs will now provide us access to our Plex server:
- https://reverent-meadow-17648.pktriot.net
- https://reverent-meadow-17648.pktriot.net:22213
- https://159.203.126.35:22213
We need to update our Plex server to be aware that we intend to access it with these URLs.
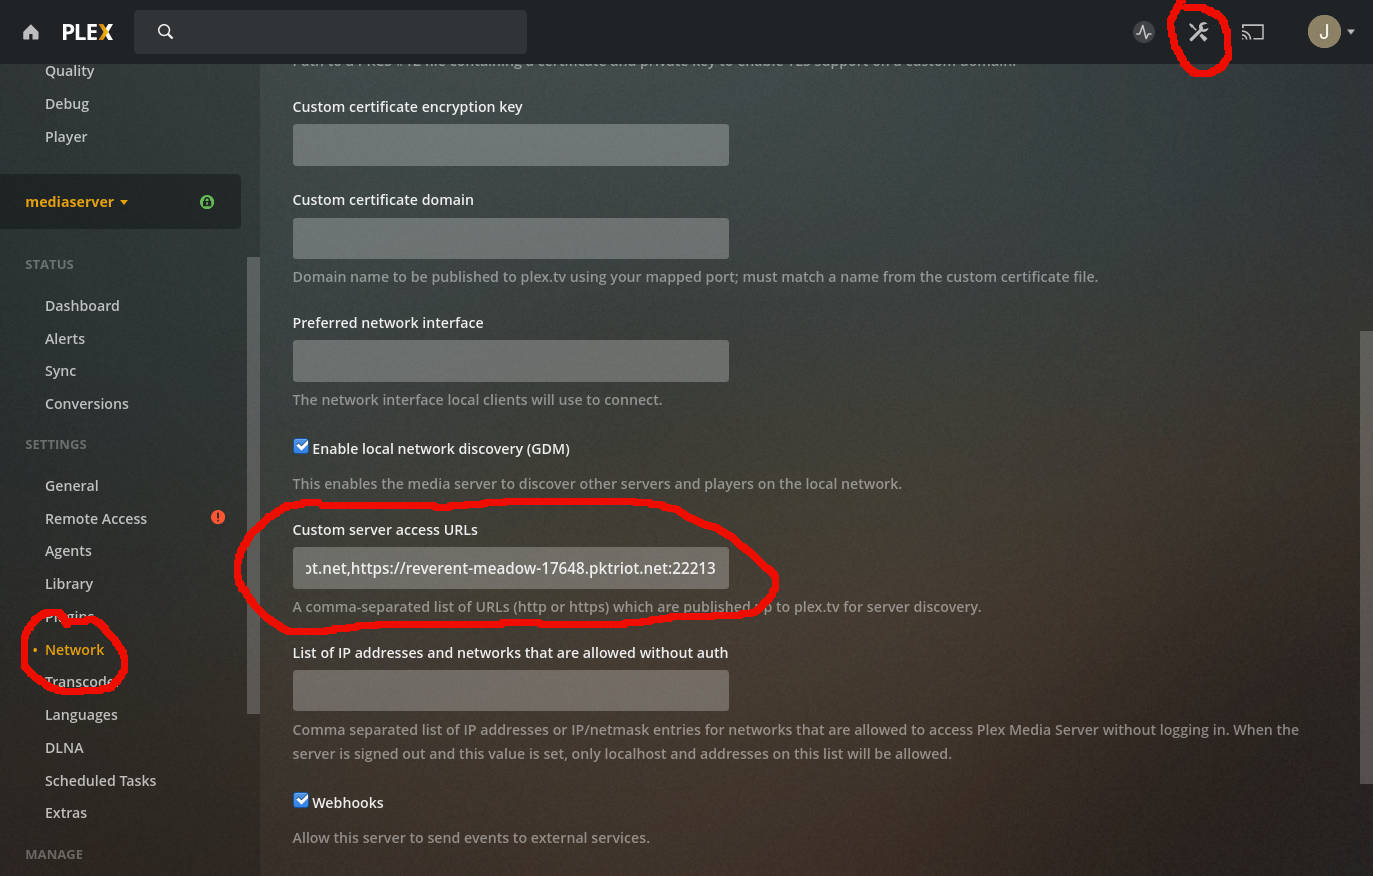
Update Server Access URLs.
Visiting Plex using the local IP address http://127.0.0.1:32400 visit the settings page. From there, find Network settings in the side-menu on the left. Click that and scroll down to the field named Custom server access URLs. This is the field we need to add our URLs too, in comma-separated format:
https://reverent-meadow-17648.pktriot.net,https://reverent-meadow-17648.pktriot.net:22213,https://159.203.126.35:22213
Underneath the hood, Plex is examing these URLs and pulling out the hostnames. These hosts are used to determine whether the Plex server is going to respond to the request or not. The new hosts that Plex will accept requests for after saving our changes are the following:
- reverent-meadow-17648.pktriot.net
- reverent-meadow-17648.pktriot.net:22213
- 159.203.126.35:22213
Remember Those Security Settings…
Earlier we discussed how you can change a security settings for Plex.
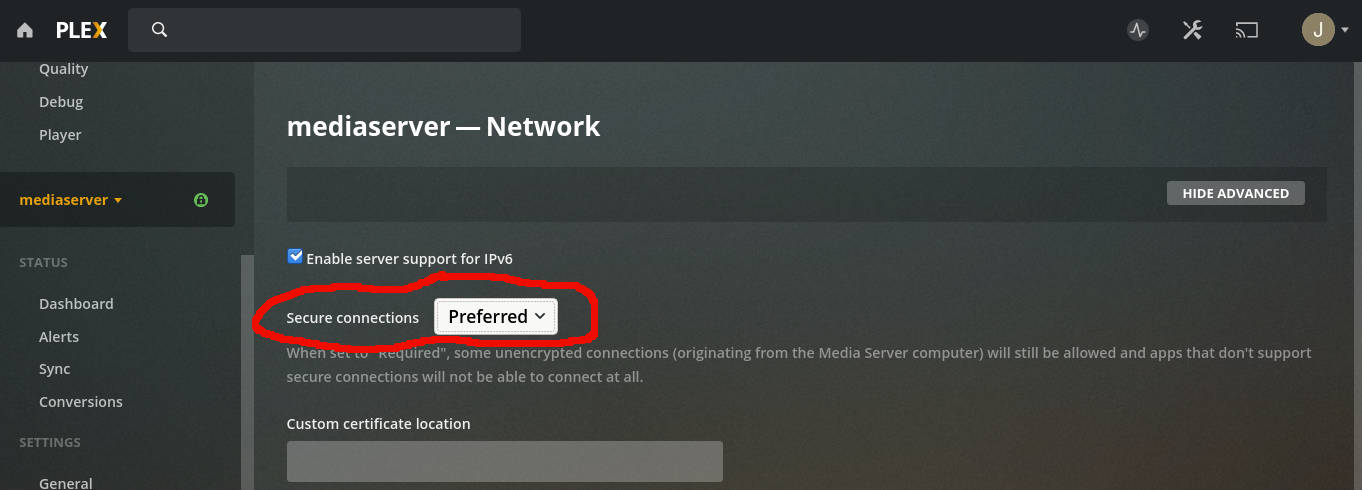
Secure Connection Settings.
Let’s first state that using https://<tunnel-hostname> will utilize TLS the for connection to the Packetriot server your tunnel connects to. Also, the relaying connection the Packetriot client makes to the server it connects to is also using TLS. Nothing on the public Internet is unencrypted.
When the setting is set to Preferred Plex will accept HTTP requests on listening address 127.0.0.1:32400 on your Plex Media Server. The Packetriot client terminates TLS when it receives traffic so the requests are proxied to Plex Media Server in an unencrypted manner.
This is probably for most users unless you don’t trust your home/private network.
When Preferred is set these URLs in your browser will work:
- https://reverent-meadow-17648.pktriot.net
- https://reverent-meadow-17648.pktriot.net:22213
- https://159.203.126.35:22213
If you want to restrict the Plex server to be the only party to perform the TLS handshakes, then you want change this setting to Required. Plex will generate it’s own TLS certificate. With this setting, only the following URLs will work in your browser:
- https://reverent-meadow-17648.pktriot.net:22213
- https://159.203.126.35:22213
My Two Cents…
What is the most flexible option? I think Preferred. I’d like to skip having to remember a custom port, e.g. 22213, but this is all preference and you can always just use bookmarks :)
Mobile Apps
Your iOS and Android devices will seem to use the URL that utilizes the IP address: https://159.203.126.35:22213.
Conclusion
We only need to create two simple rules to cover several configuration options.
I hope this tutorial was helpful. If I got something completely wrong with Plex, please tweet or DM on Twitter. Or email contact us via email. Have more configuration questions? Don’t hesitate reaching out.
Happy Plex’ing when you’re on the go, cheers!