Manage Passwords Securely with Bitwarden
Published at December 19, 2020 · 11 min read
Share on:Bitwarden is a password manager and secure vault application. It’s a great alternative to very popular password managers such as LastPass and 1Password. Bitwarden provides it’s own hosting services but it’s open-source which makes it easy to host on your own.
Secure Password Management
Hosting a password vault and having the ability to inspect and audit the data it stores provides piece of mind. Bitwarden doesn’t sacrifice convenience and comes with companion applications for iOS and Android. It also includes browser extensions, making it very simple to integrate password management into web browsing, making it a very competitve alternative to service providers like LastPass and 1Password.
In this tutorial we’ll setup an instance of Bitwarden using Docker and a compose file. We’ll also setup a Packetriot tunnel using a custom domain.
Setting up the mobile apps to connect to your Bitwarden server is easy and we will walk through that as well.
One thing to take note is that this tutorial is focusing on setting up Bitwarden, however, you can add any number of other services to the compose file. You can host any number of websites behind a Packetriot tunnel too. Feel free to borrow from other tutorials we’ve written.
For now, let’s focus on hosting Bitwarden but don’t let it limit your imagination to what other applications you’d like to host. Let’s get started!
Initial Setup & Compose File
Be sure to have Docker and Docker-compose installed. This tutorial will work on Linux, Mac and Windows. Our steps will be performed using Linux but they can be tailored to work just the same in Windows and identically on Macs.
I use a convention of keeping my compose file in a directory with all of the data sub-directories mounted into the containers. We’ll call this root directory containers but you can name it anything you’d prefer. Create this directory and change to it.
We’ll create our docker-compose.yml in the containers directory. Use your favorite editor.
[user@host ] mkdir containers
[user@host ] cd ~/containers

[user@host:~/containers ] vim docker-compose.yml
We’re going to setup Bitwarden and enable the admin dashboard. To do this securely let’s generate a random string using the command openssl. We’ll be setting this random value as an environment variable in the Bitwarden service block in the compose file.
[user@host:~/containers ] openssl rand -hex 8
430622941280eb7f
Below is the compose file we want to build. We’re customizing a few options in the server but most important is that we are disabling sign-ups. We don’t want random people on the Internet using our Bitwarden server. We also turn on web-sockets and enabled the admin dashboard by setting the token we just generated.
Finally, we set the domain for our server to be https://bitwarden.packetdemo.com. Use any custom domain you’d own. Be sure to first verify ownership of the domain before using the domain with any tunnel traffic rules. You can also use the hostname assigned to your Packetriot tunnel, e.g. awesome-tunnel-123.pktriot.net. However, this is a password vault we’re setting up and you want and should use end-to-end encryption and control the private key and TLS certificates.
We’ve also included a service block for the Packetriot client program, pktriot, in the compose file.
In both the Packetriot and Bitwarden container, we mapped a sub-directory into the container. These directories will store the important data and settings for each of them and make it easy for us to update in the future or migrate to another host machine.
version: '3'

services:
  pktriot-tunnel:
    image: packetriot/pktriot:latest
    restart: unless-stopped
    volumes:
      - ./pktriot:/data

  bitwarden:
    image: bitwardenrs/server
    restart: unless-stopped
    environment:
      - WEBSOCKET_ENABLED=true
      - ADMIN_TOKEN=430622941280eb7f
      - SIGNUPS_ALLOWED=false
      - DOMAIN=https://bitwarden.packetdemo.com
    volumes:
      - ./bitwarden:/data
Start the Containers
Be sure to change to the containers directory. We can create and start the containers with docker-compose up -d. Below are examples of the commands and their output.
This command will pull down the container images used by the services we added to our compose file. It will also create the virtual network and container instances and start them up.
[user@host:~/containers ] docker-compose up -d
Creating network "bitwarden_default" with the default driver
Pulling bitwarden (bitwardenrs/server:)...
latest: Pulling from bitwardenrs/server
d121f8d1c412: Pull complete
d85ea1849731: Pull complete
b4ffe2ab3d9d: Pull complete
2a7a7c3e7767: Pull complete
1a2ddc86edec: Pull complete
12fdffcd637d: Pull complete
8f68ecc48fdf: Pull complete
d29be6f4f798: Pull complete
Digest: sha256:b049aee511b1ec50c316d3a0edc0018ed8b8a53ec65b801cff1ead02744e74e1
Status: Downloaded newer image for bitwardenrs/server:latest
Creating bitwarden_bitwarden_1      ... done
Creating bitwarden_pktriot-tunnel_1 ... done
All of the containers should be up and running.
[user@host:~/containers ] docker ps
CONTAINER ID        IMAGE                       COMMAND                  CREATED              STATUS                        PORTS               NAMES
be5f7f7ea589        packetriot/pktriot:latest   "/usr/bin/pktriot --…"   About a minute ago   Up About a minute                                 bitwarden_pktriot-tunnel_1
bc963bc174ff        bitwardenrs/server          "/start.sh"              About a minute ago   Up About a minute (healthy)   80/tcp, 3012/tcp    bitwarden_bitwarden_1
Configure Tunnel & Traffic Rules
In this tutorial we are using a custom domain, so be sure to verify a custom domain you own that you are using to follow along.
Change into the containers directory. We’ll use the command docker exec -it to execute a command inside the pktriot container to configure a new tunnel. The -it flag is very important to include since we will be interacting with the pktriot program inside the container.
[user@host:~/containers ] docker exec -it bitwarden_pktriot-tunnel_1 pktriot configure
Choose a path to the configuration file:
[1] /etc/pktriot/config.json
[2] /data/config.json
[3] /root/.pktriot/config.json

Input selection [#]: 2

Authenticate client with login credentials. Created account w/Google SSO? Use --url with 'configure'.

Email:
Choose option [2] to store the configuration in /data/config.json. This file will be available on your host in the path ~/containers/pktriot/config.json.
Be sure to chose a region that is closest to you geographically. For network latency and speed this is important.
Email: user@email.com
Password:
Authenticated!

Choose the region for the edge server to connect to:
+------------------------+
| #   | Region           |
+------------------------+
| 1   | us-east          |
+------------------------+
| 2   | us-west          |
+------------------------+
| 3   | eu-central       |
+------------------------+
| 4   | asia-southeast   |
+------------------------+
| 5   | australia        |
+------------------------+
| 6   | us-south         |
+------------------------+
| 7   | asia-south       |
+------------------------+
| 8   | africa-south     |
+------------------------+

Input selection [#]: 1

Tunnel configuration:
  Hostname: still-lake-76909.pktriot.net
  Server: us-east-63815.packetriot.net
  IPv4: 138.197.66.62
  IPv6: 2604:a880:800:a1::dc:f001

Start the tunnel and visit URL to check its working:
  pktriot --config /data/config.json start
  https://still-lake-76909.pktriot.net

Detailed help and step-by-step tutorials:
  https://packetriot.com/docs
  https://packetriot.com/tutorials.

Need more support?
  Email: support@packetriot.com
  Twitter: @packetriot (please follow us, we like new friends :)
Make a note of the IPv4/v6 address of the Packetriot server this tunnel was assigned to. The server assignment will not change so we can use the IP addresses to setup DNS A records for our custom domain. We can also use the hostname still-lake-76909.pktriot.net assigned to our tunnel for creating CNAME records.
Both will work for creating DNS records for our custom domain.
Once DNS is setup correctly we can add a new HTTP/S traffic rule to our tunnel configuration. We’ll enable Let’s Encrypt on this rule so that TLS certificates can be generated and updated automatically. This flag will automatically enable secure redirect which will redirect all client traffic to HTTPS.
For the destination we will use bitwarden. This is the name of the Bitwarden container from the compose file and Docker will resolve the name bitwarden to the virtual IP assigned to the container. In the case the containers’ IP changes, which happens, we won’t need to update our configuration. Finally, the destination HTTP port is 80.
Be sure to verify the name of the container using the command docker ps. It will display all running containers and their names.
[user@host:~/containers ] docker exec -it bitwarden_pktriot-tunnel_1 pktriot tunnel http add --domain bitwarden.packetdemo.com --letsencrypt --destination bitwarden --http 80
HTTP/S traffic rule added
Restart our tunnel so that the new rule is loaded. Note, it will take our 60-90 seconds for the TLS certificates to be generated. When they are available you’ll see a table printed out with more details.
[user@host:~/containers ] docker restart bitwarden_pktriot-tunnel_1

[user@host:~/containers ] docker logs -f bitwarden_pktriot-tunnel_1
Local server listening on http:80, https:443

Connecting to us-east-63815.packetriot.net...

Running HTTP services:
+----------------------------------------------------------------------------------------------------+
| Domain                     | Destination     | HTTP   | TLS   | Secure   | Protect   | Site Root   |
+----------------------------------------------------------------------------------------------------+
| bitwarden.packetdemo.com   | bitwarden       | 80     | 0     | true     |           | --          |
+----------------------------------------------------------------------------------------------------+

Certificates from Let's Encrypt are loaded asynchronously, please be patient (<90s) when initializing new domains.

+----------------------------------------------------------------+
| Certificate Domain         | Status      | Expiration          |
+----------------------------------------------------------------+
| bitwarden.packetdemo.com   | Available   | Mar 21 20:30 2021   |
+----------------------------------------------------------------+
Bitwarden Setup
We need to configure a few things in Bitwarden before we start using it. Visit the URL to the admin page, in our example we will visit https://bitwarden.packetdemo.com/admin. Be sure to add /admin to the URL you used for the domain you used for your Bitwarden instance.
We’ve provided a screenshot below for the welcome page. You’ll be prompted for the admin token. We generated this earlier using the openssl command and input it into our compose file. Reference that for the admin token value.
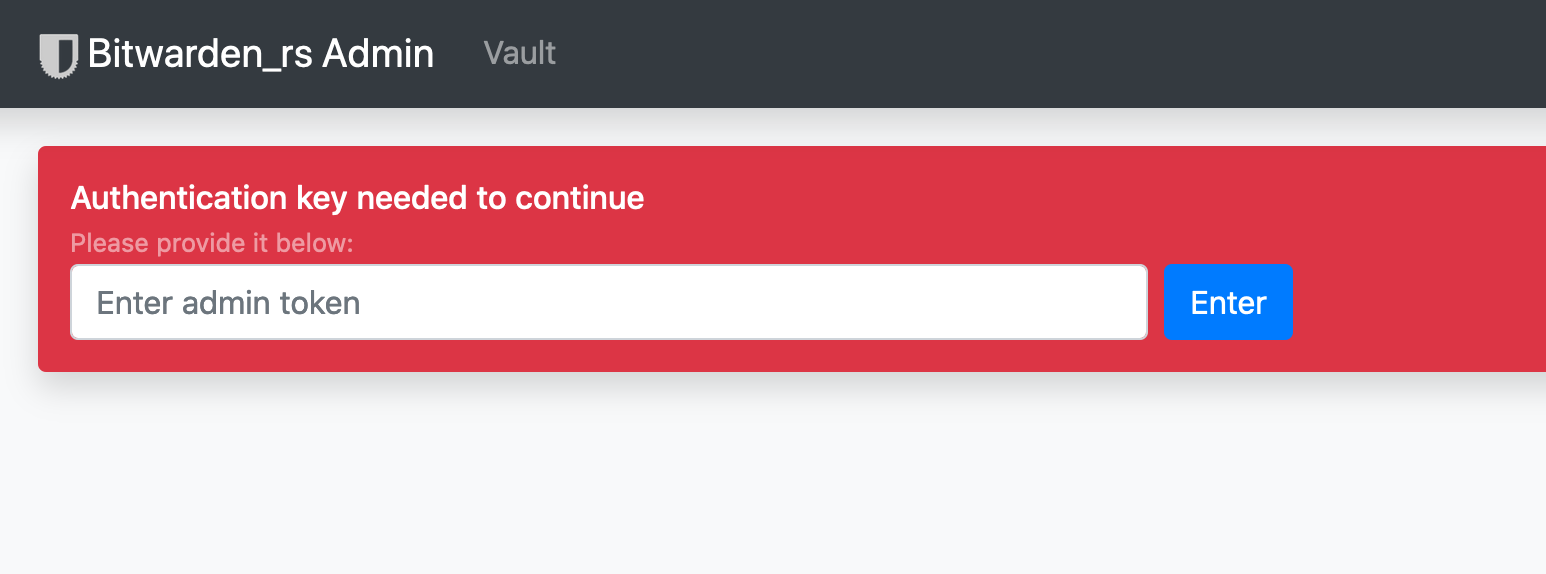
Admin Login
You’ll be greeted next with the administrative dashboard. There’s lot of options of here, we’re going to focus on the adding users, which is a link available on the top navigation bar.
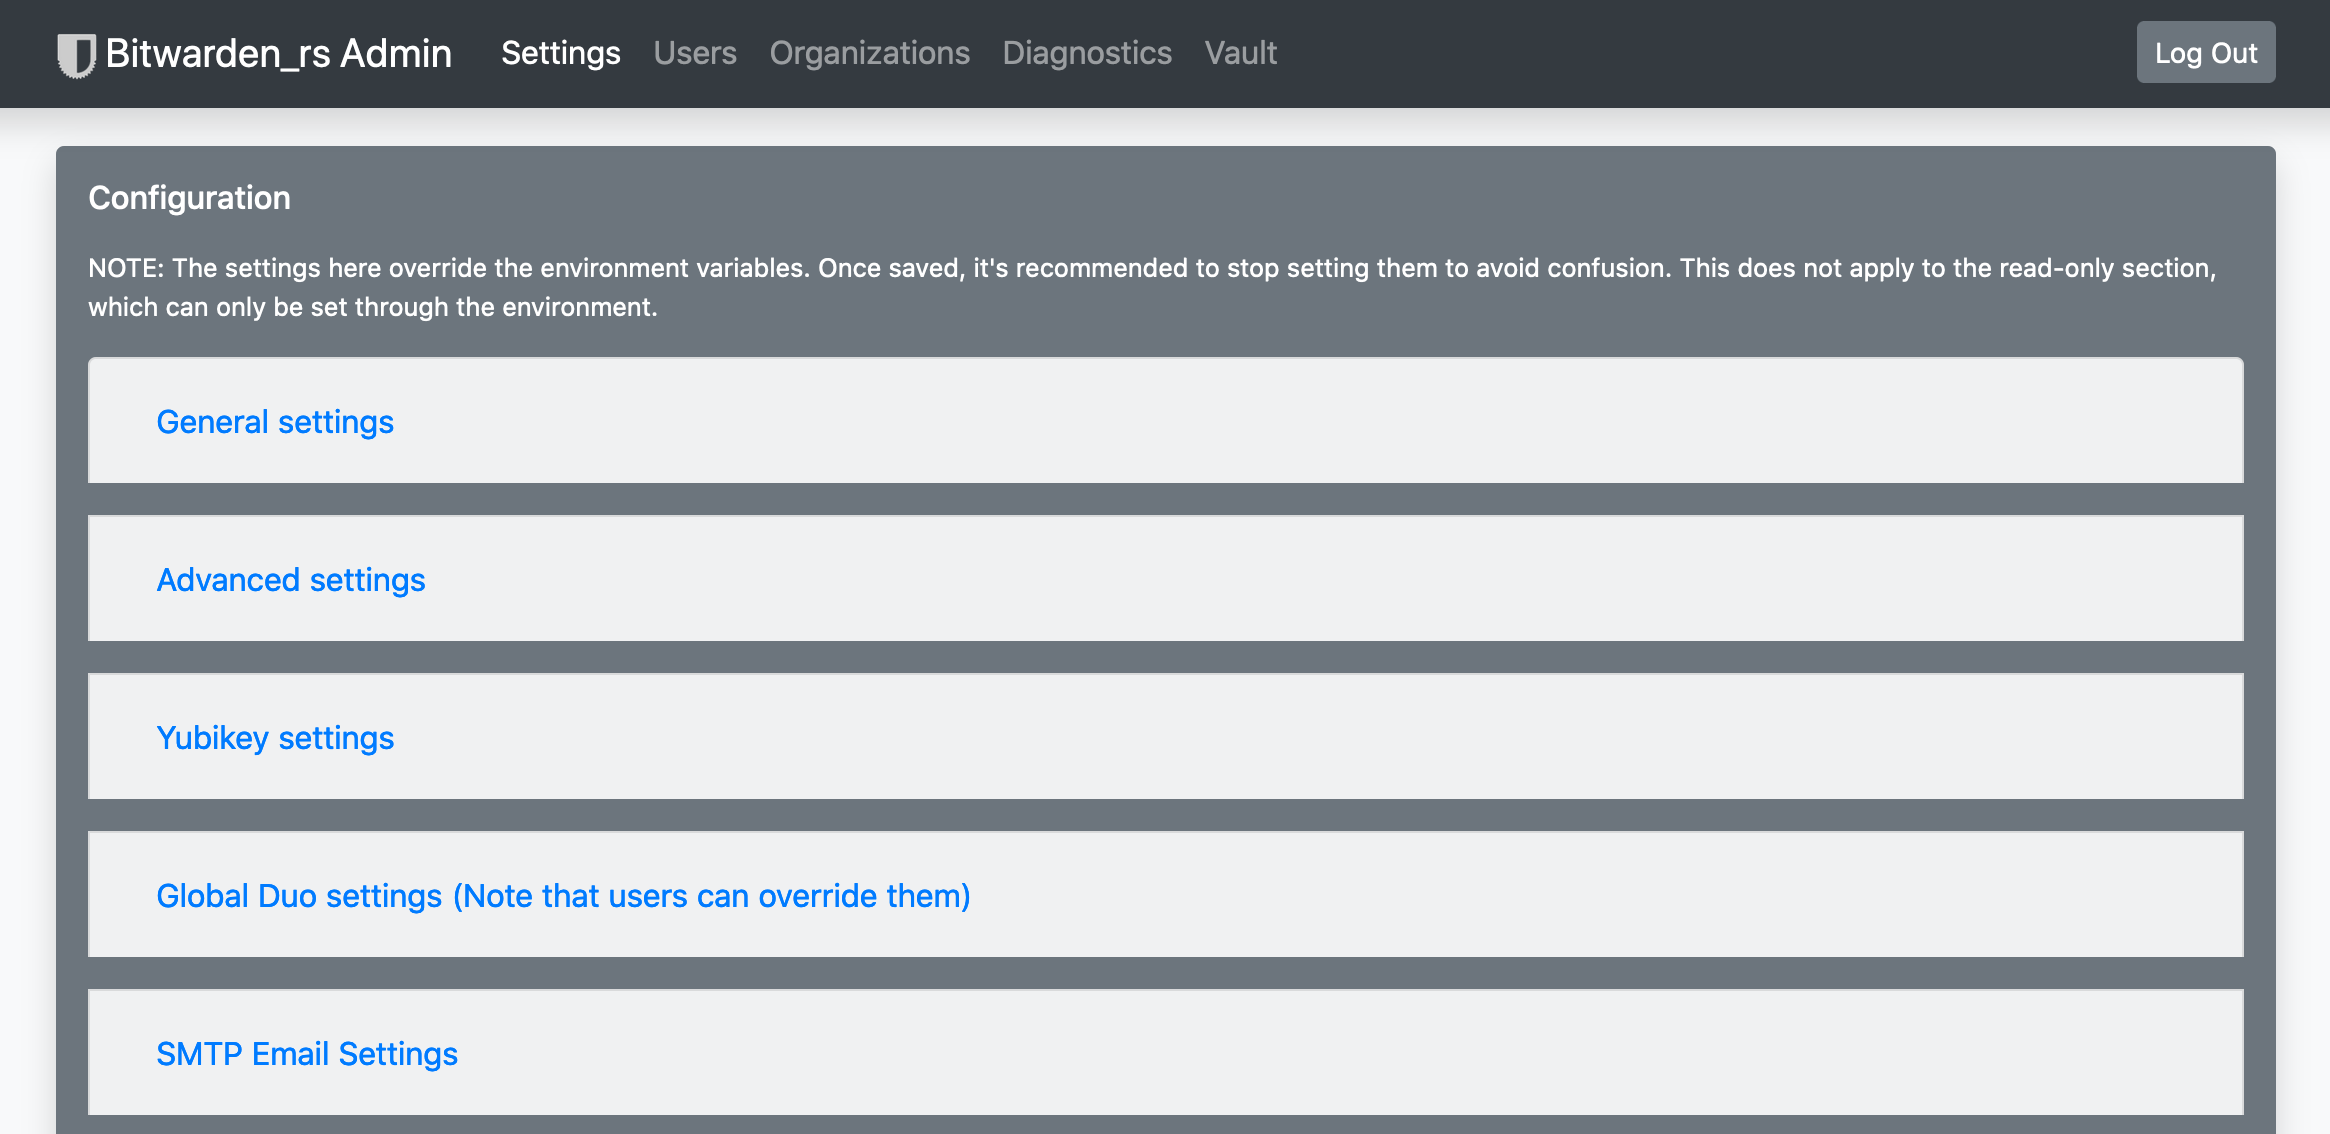
Admin Dashboard
Now let’s add our first user.
Setting up Users in Bitwarden
To add a user we must “invite” them. A password will not be set, so the user you are inviting will need to visit the homepage for your bitwarden instance and input the email and an empty password.
First, let’s walk through invitations. Simply input an email in the “Invite User” field and click the “Invite” button.
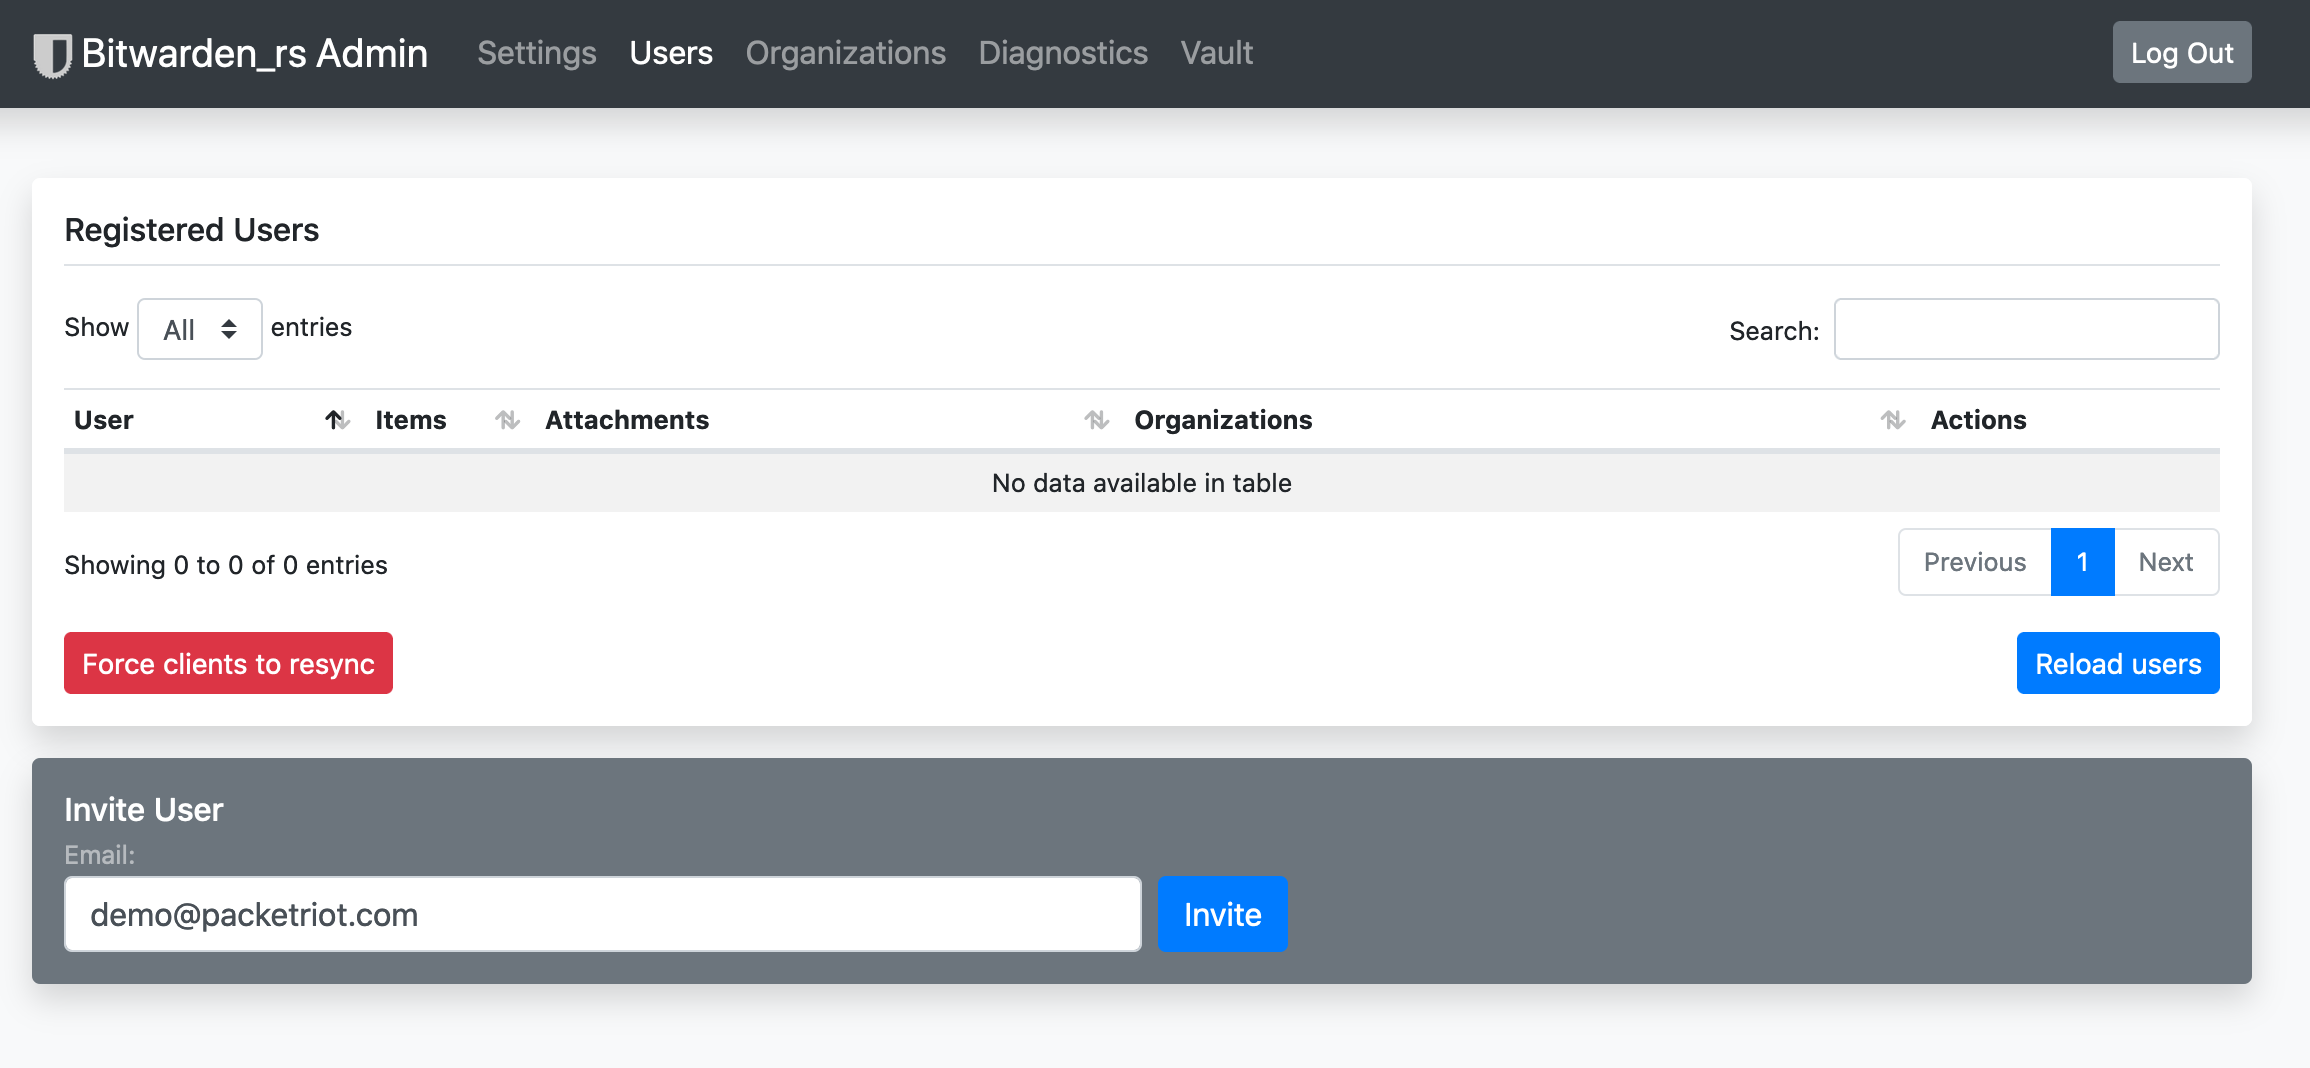
Invite User
A new row in the user table will be added with this user.
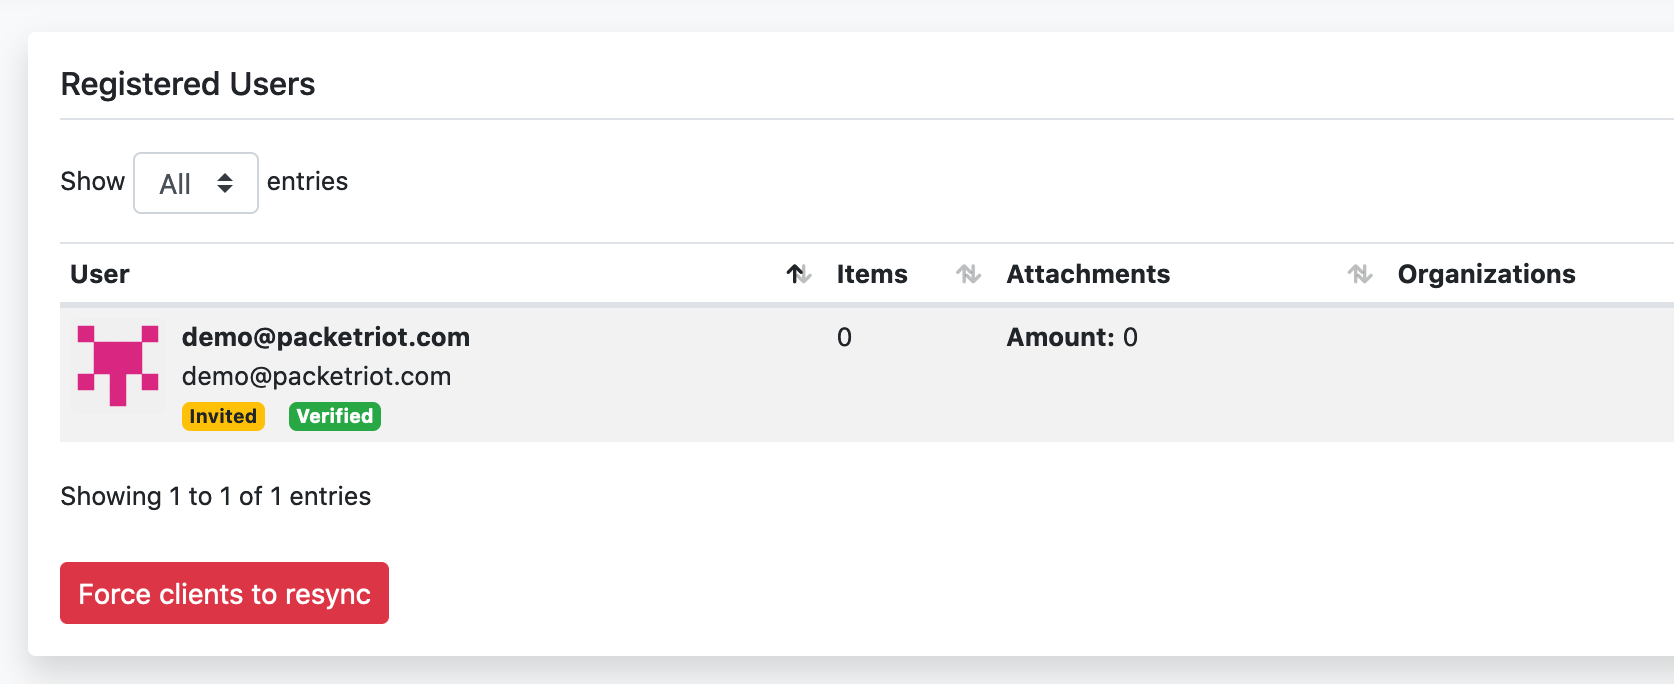
Invite User
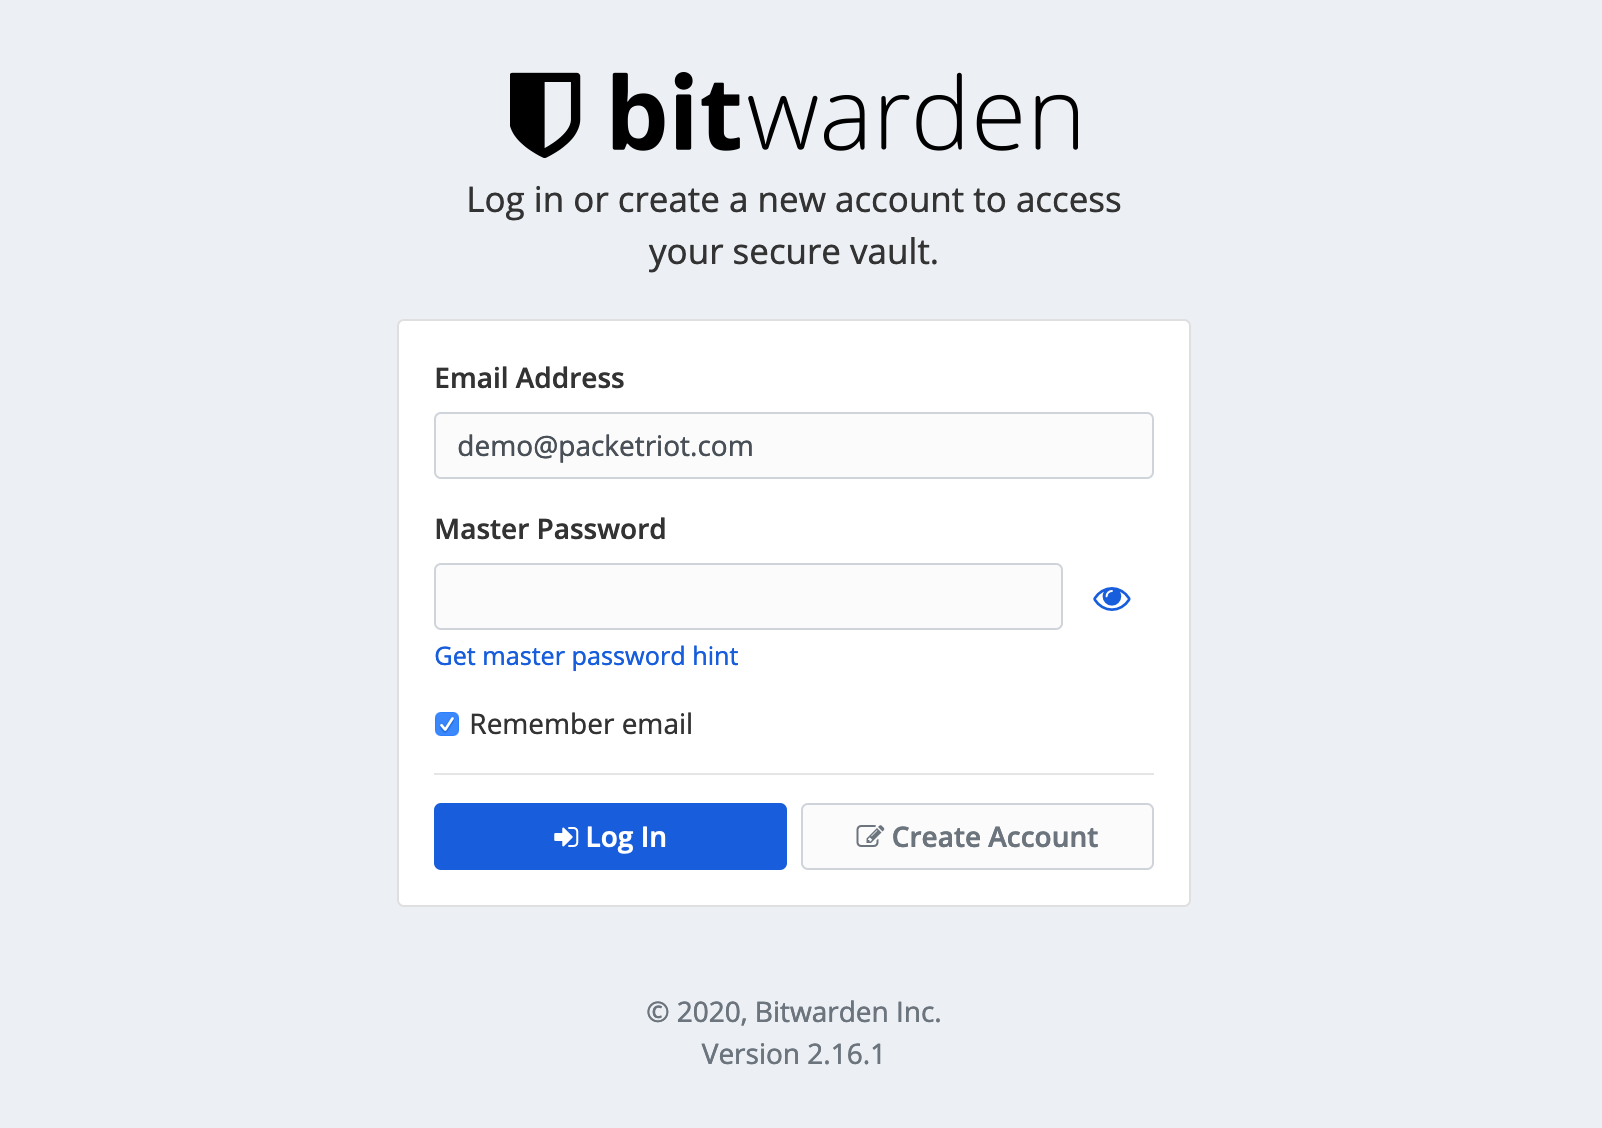
Log out of the admin page. We can now finish setting up our user. You should be redirected to the homepage of your Bitwarden instance. Note, you can click the “Vault” link in case you’re not.
Input the email address for the user you invited and click the “Create Account” button. Leave the password field empty, we’ll set a new password in the next screen.
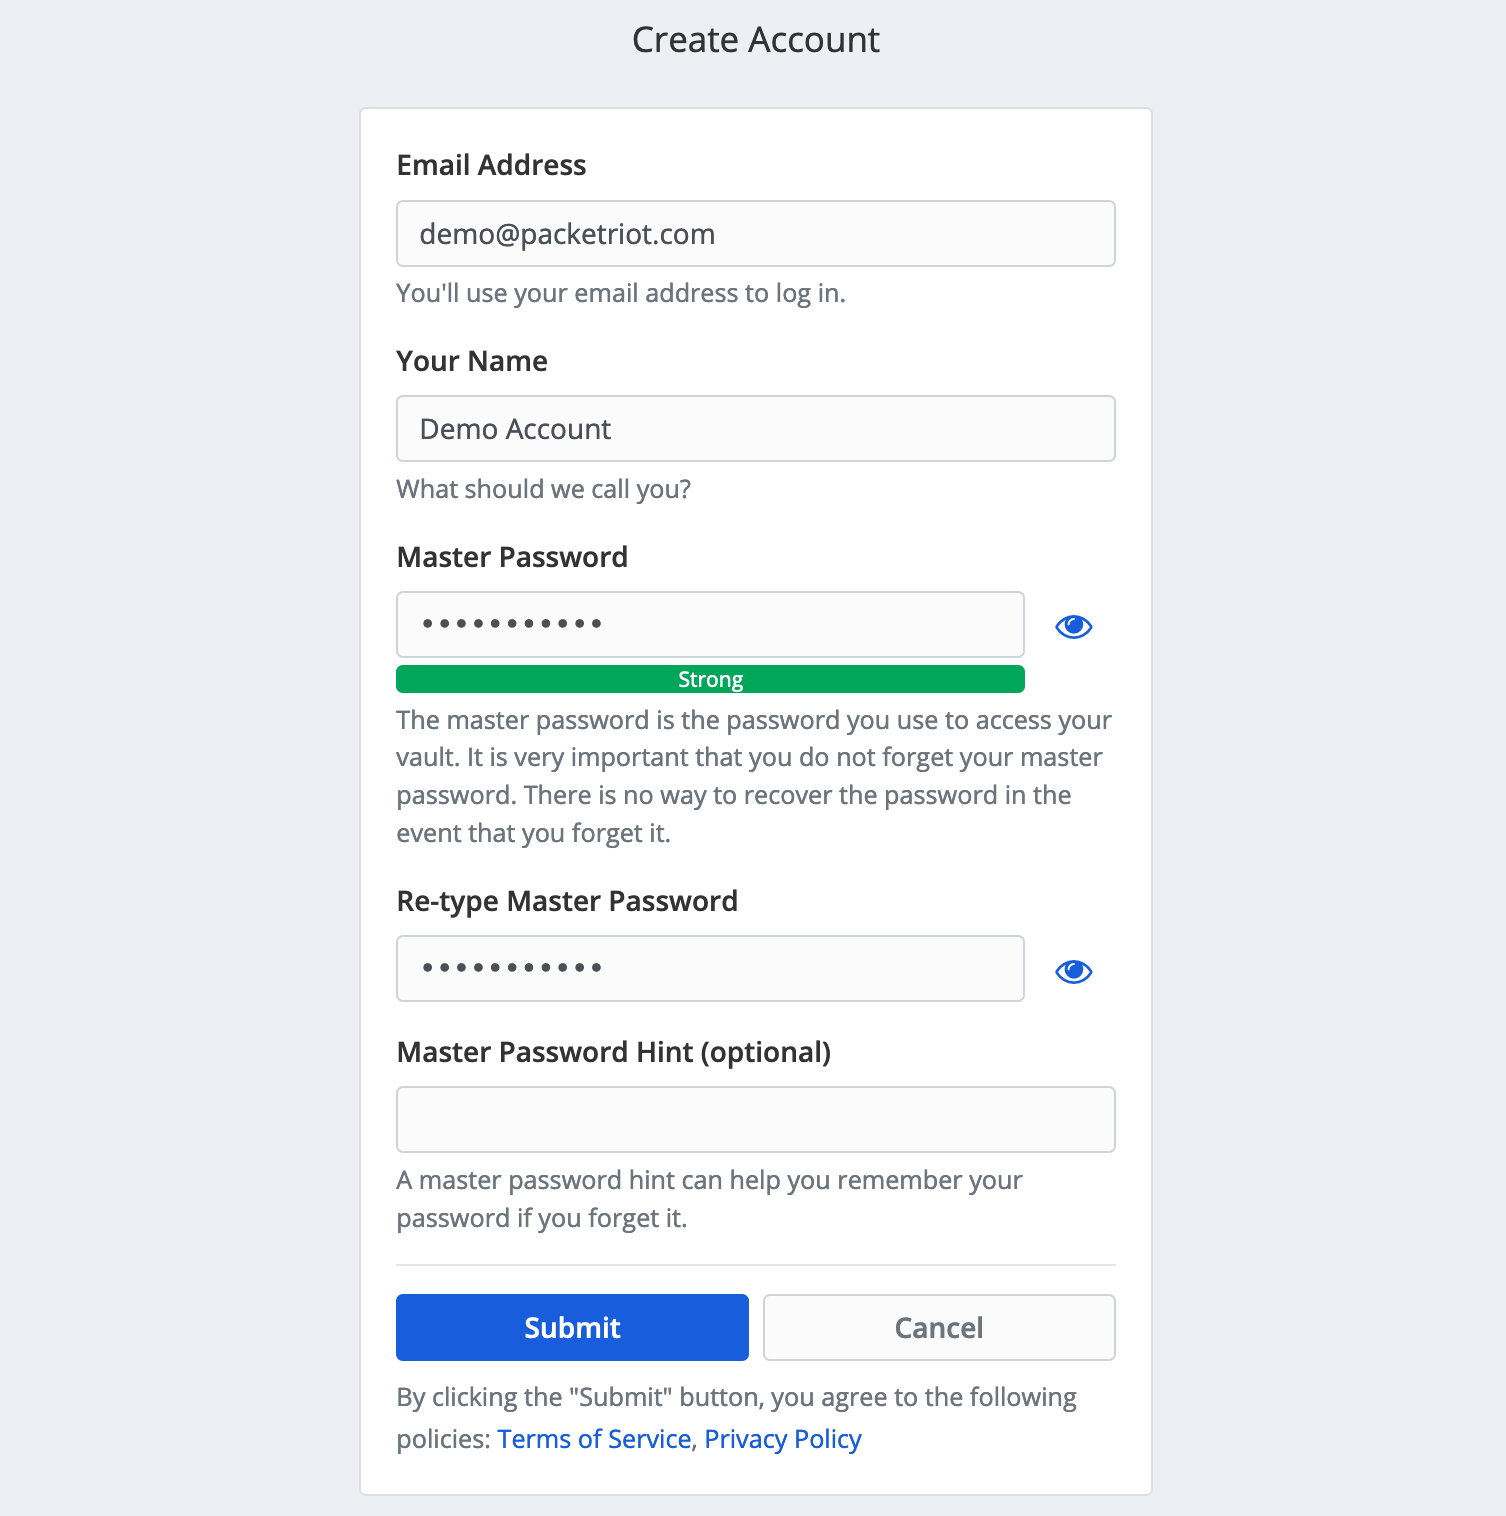
Create User Account
In this screen set a fullname and the password for this user, click the “Submit” button when you’re done.
Setup Password for User
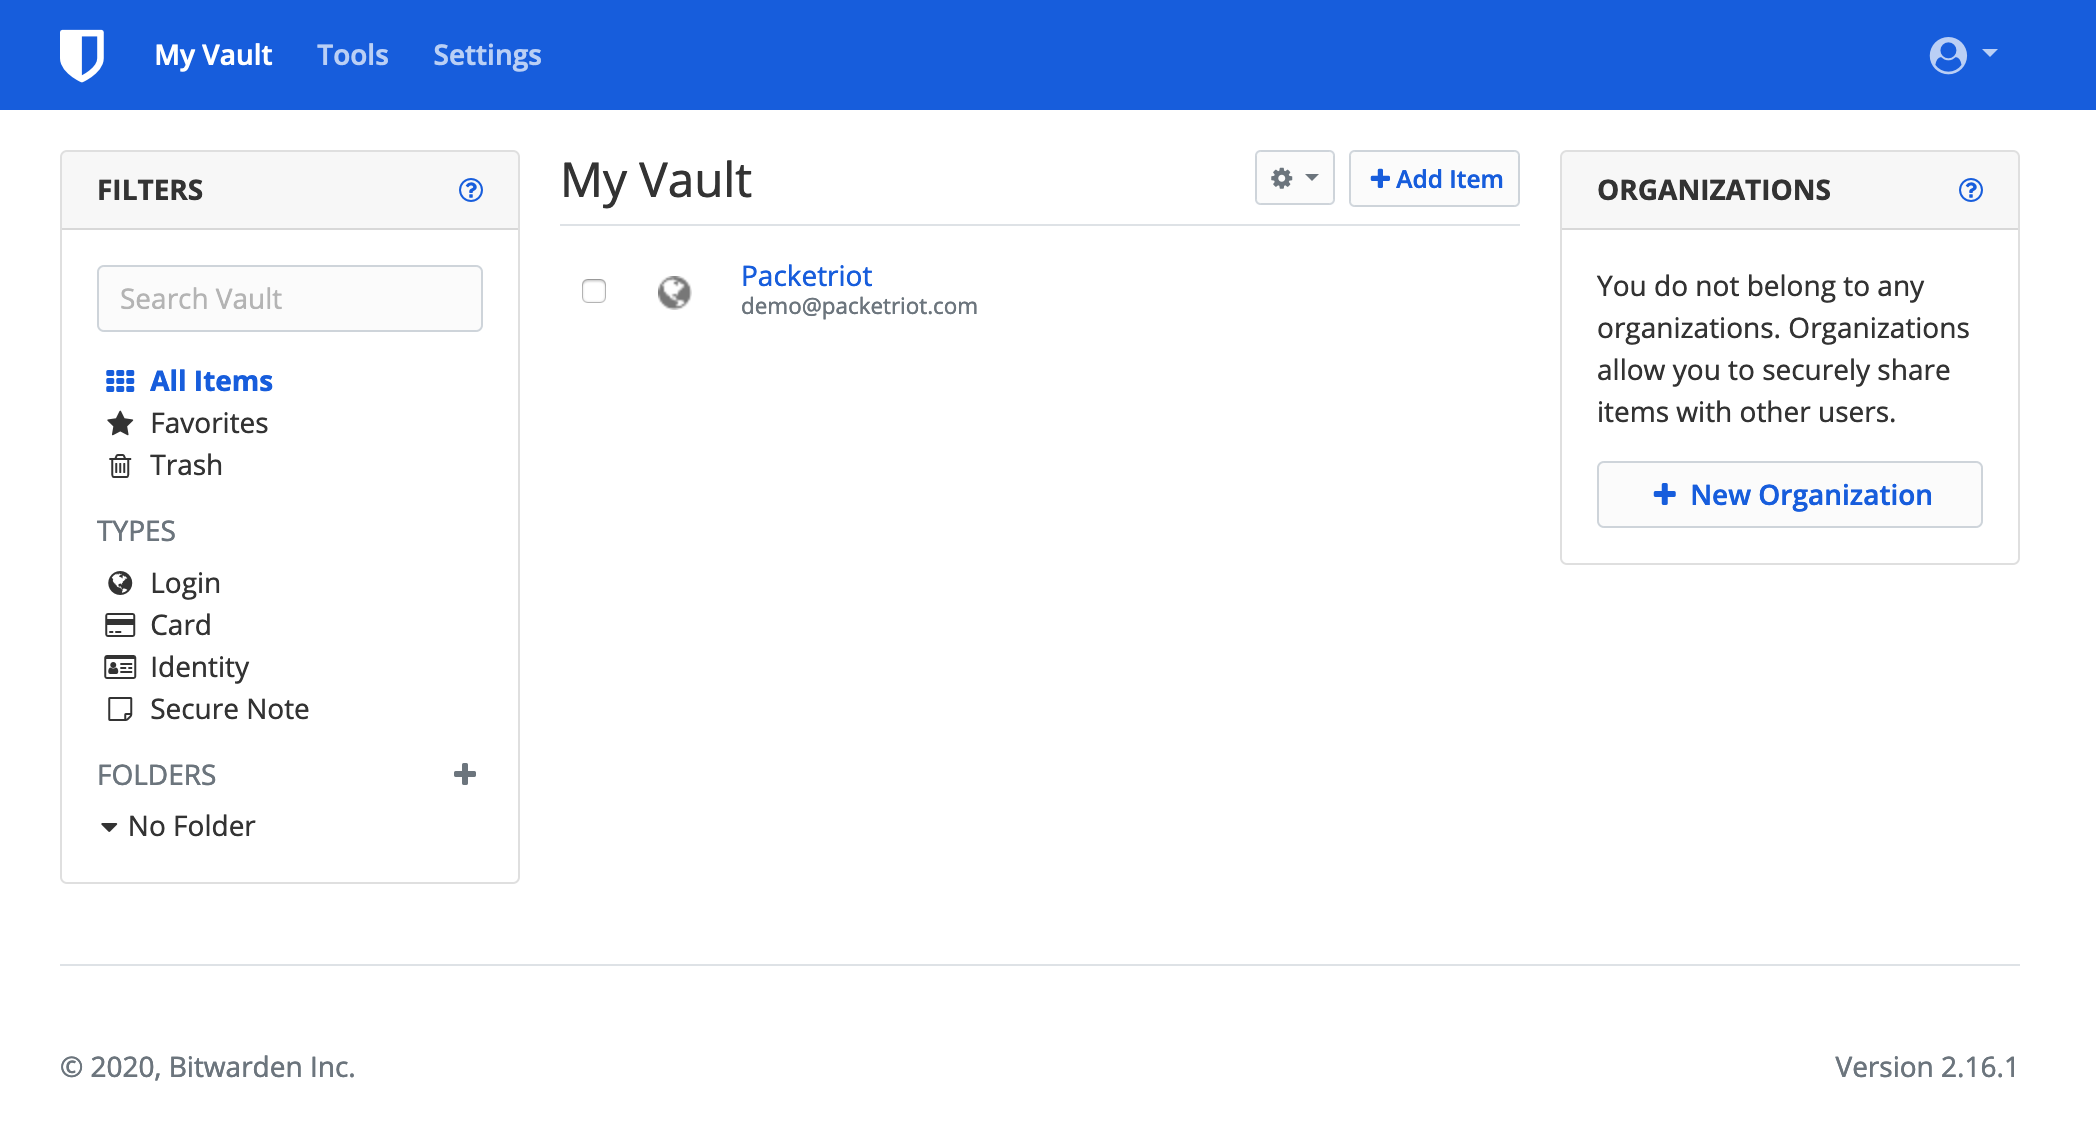
You’ll be redirected the homepage of the Bitwarden instance. Just log in using the credentials you created and you’ll be greeted with a dashboard to manage your logins and other sensitive data.
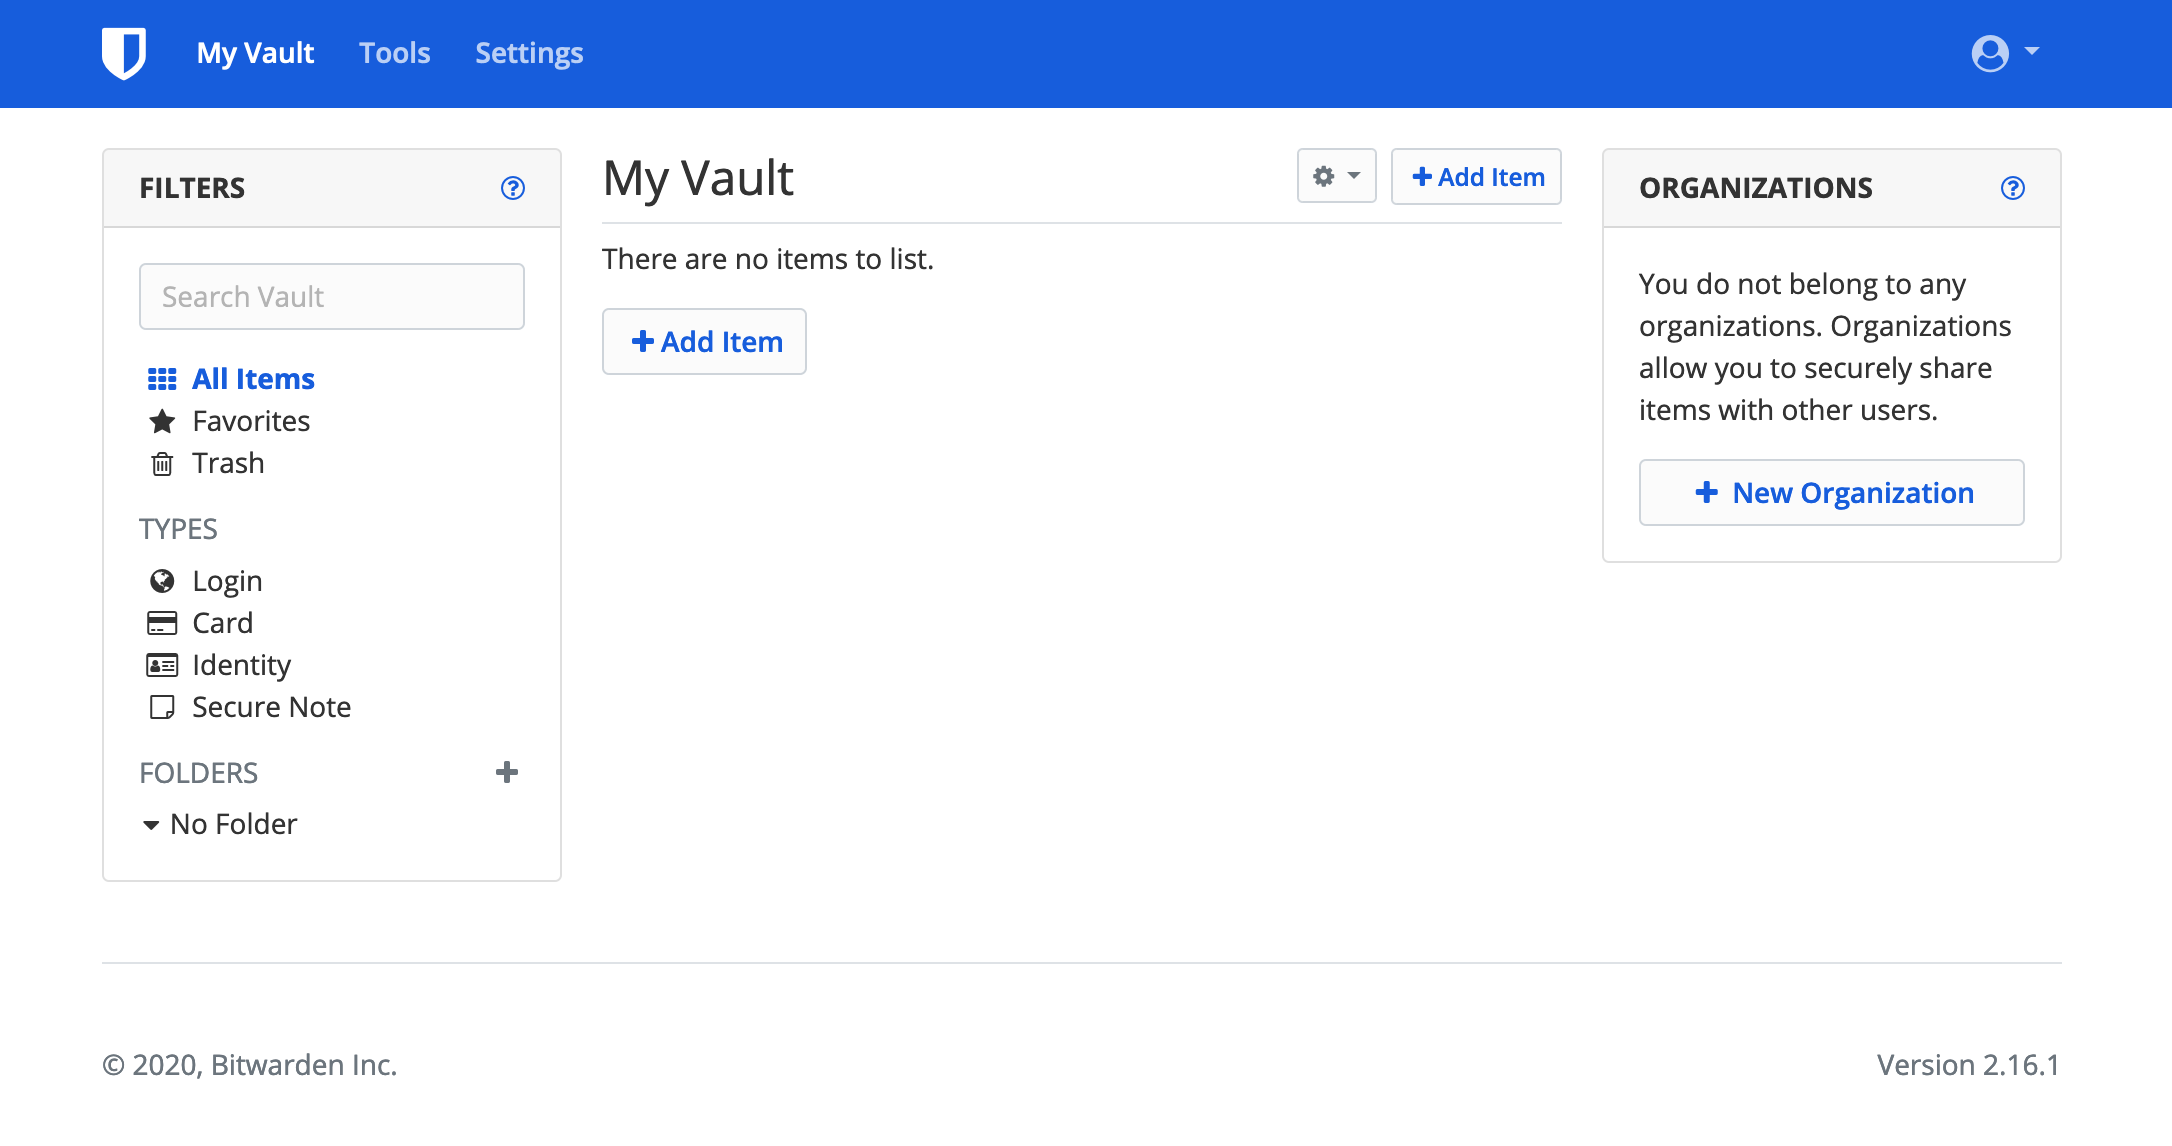
Dashboard for User
We suggest adding your Packetriot account first :)
One question that may come to mind is where is all this data being stored? You’ll find it in the ~/containers/bitwarden directory. Here you will find a SQLite database, keys, and other data generated by Bitwarden.
Browser Extensions
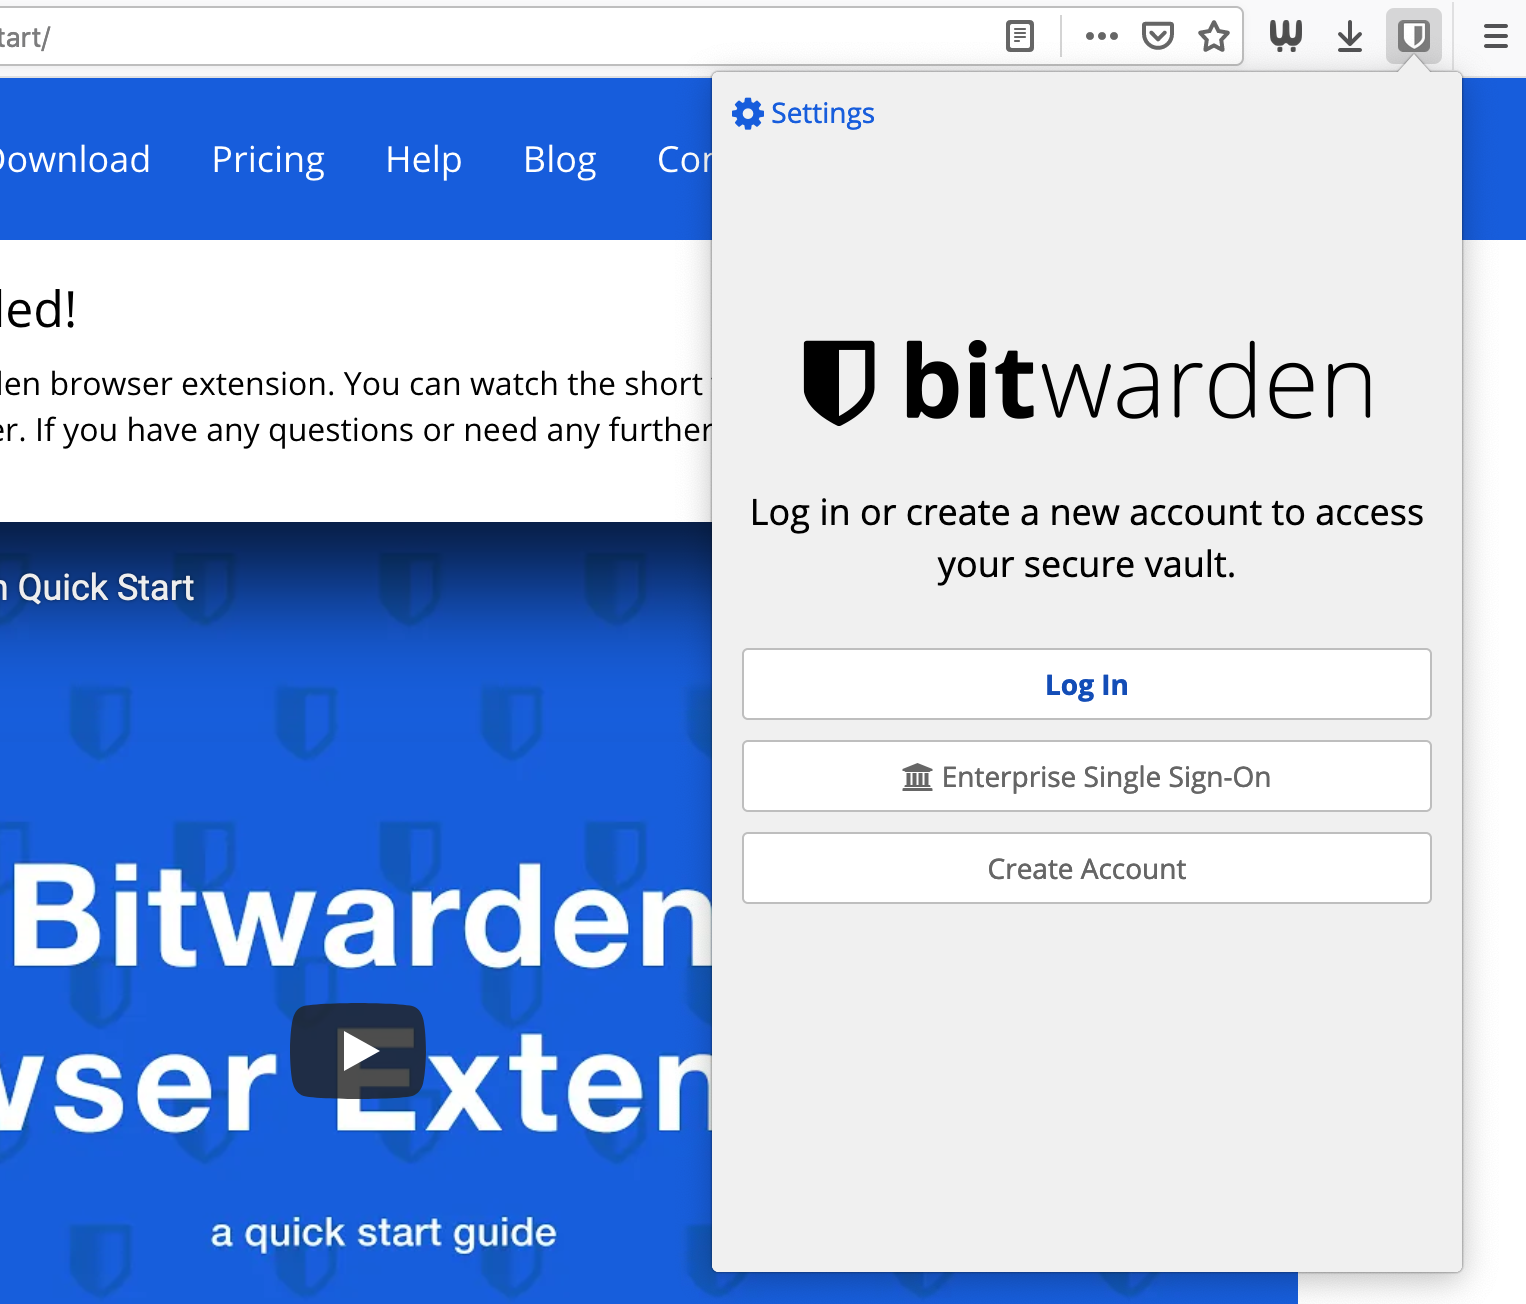
Installing and using the browser extension really makes using Bitwarden effortless. Visit the downloads on the Bitwarden website and scroll down the browser section. Pick your browser of choice and and add the extension.
This tutorial is using Firefox. In the screenshot below the extension has been installed. Before logging in we need to clicking on the “Settings” button and change the URL to the Bitwarden server we want to use.
Extension Settings
Input the URL to your Bitwarden server. In our case we will use https://bitwarden.packetdemo.com. Save your changes.
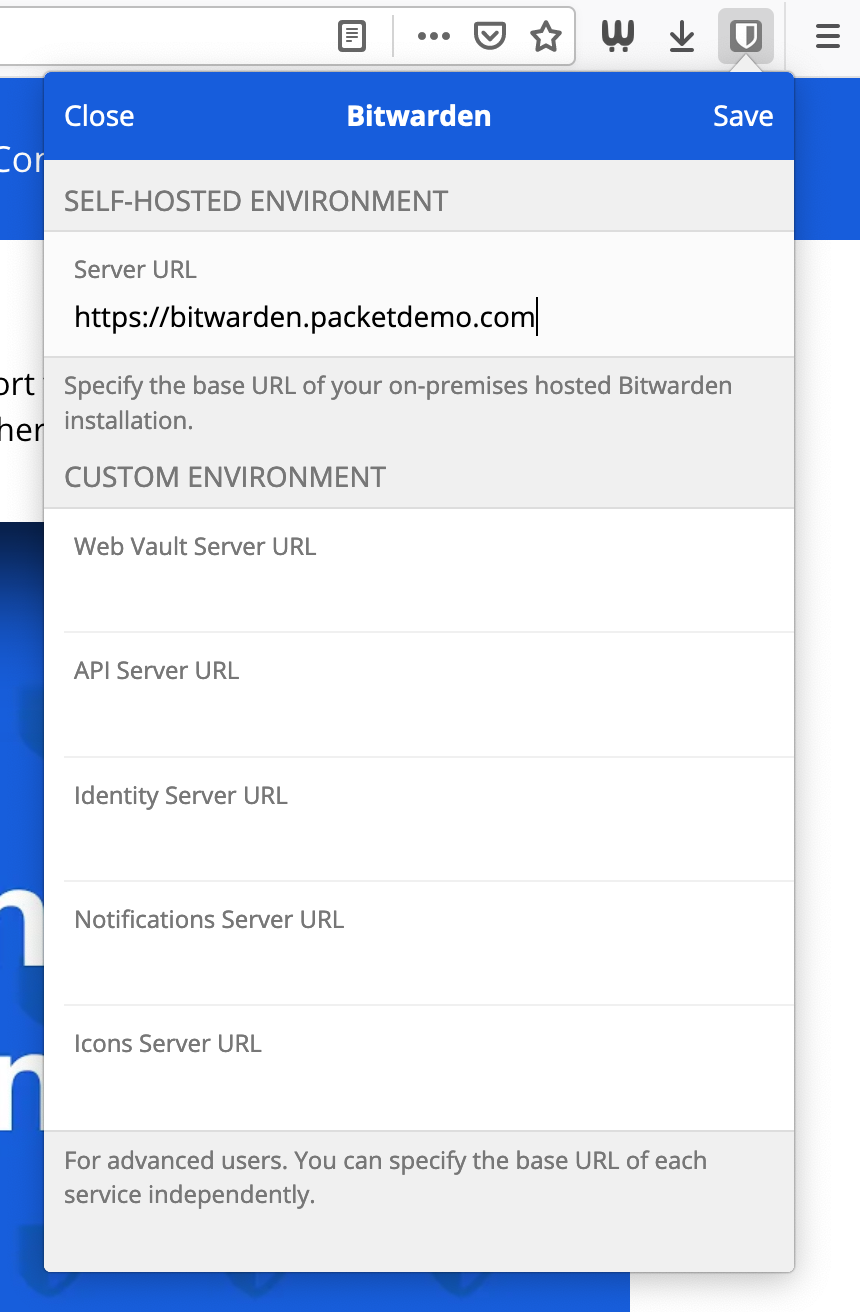
Custom Server URL
Now you can log into your account on the Bitwarden server you’re hosting. Input your credentials and click the “Log in” button.
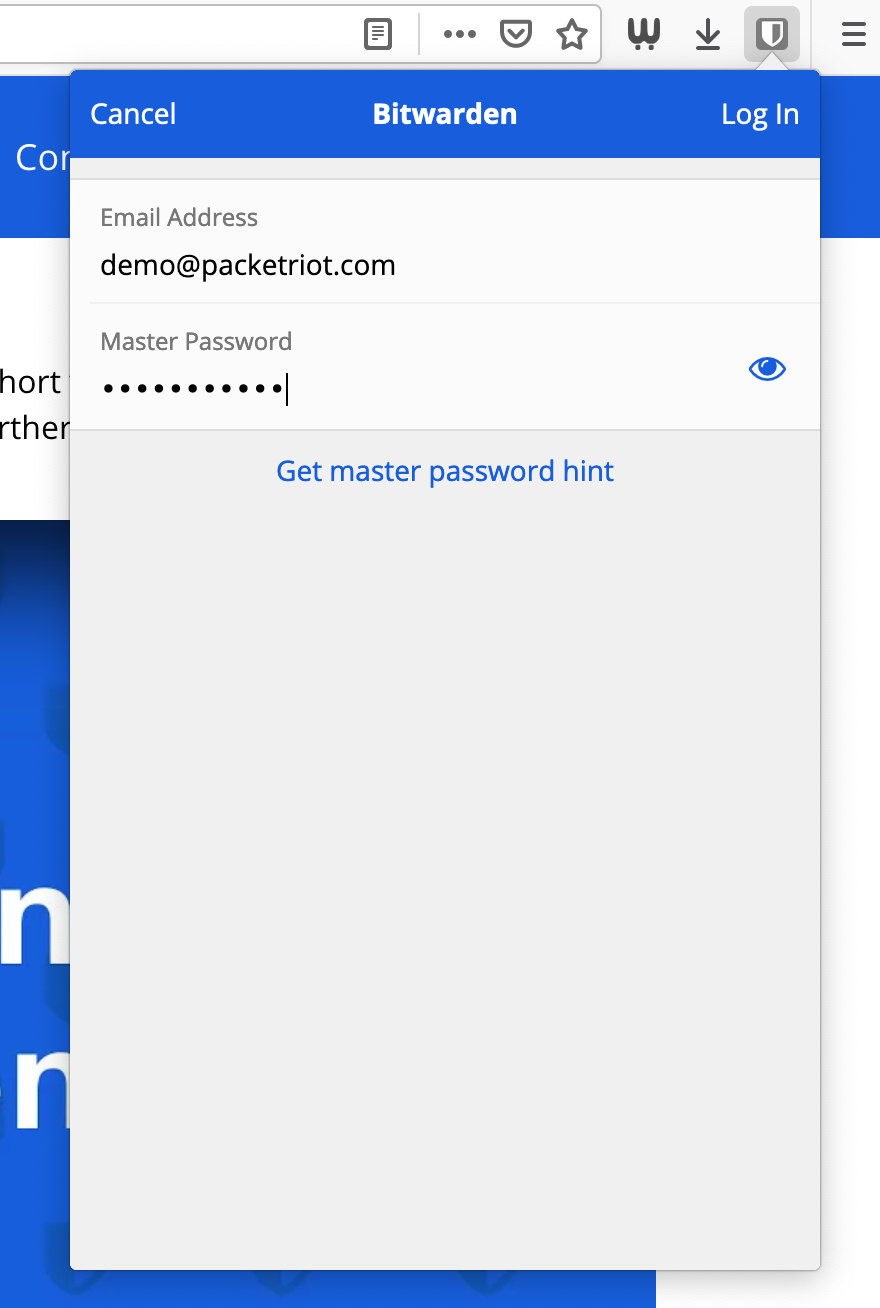
Extension Login
You’ll be able to any credentials you’ve added. We added our Packetriot account :)
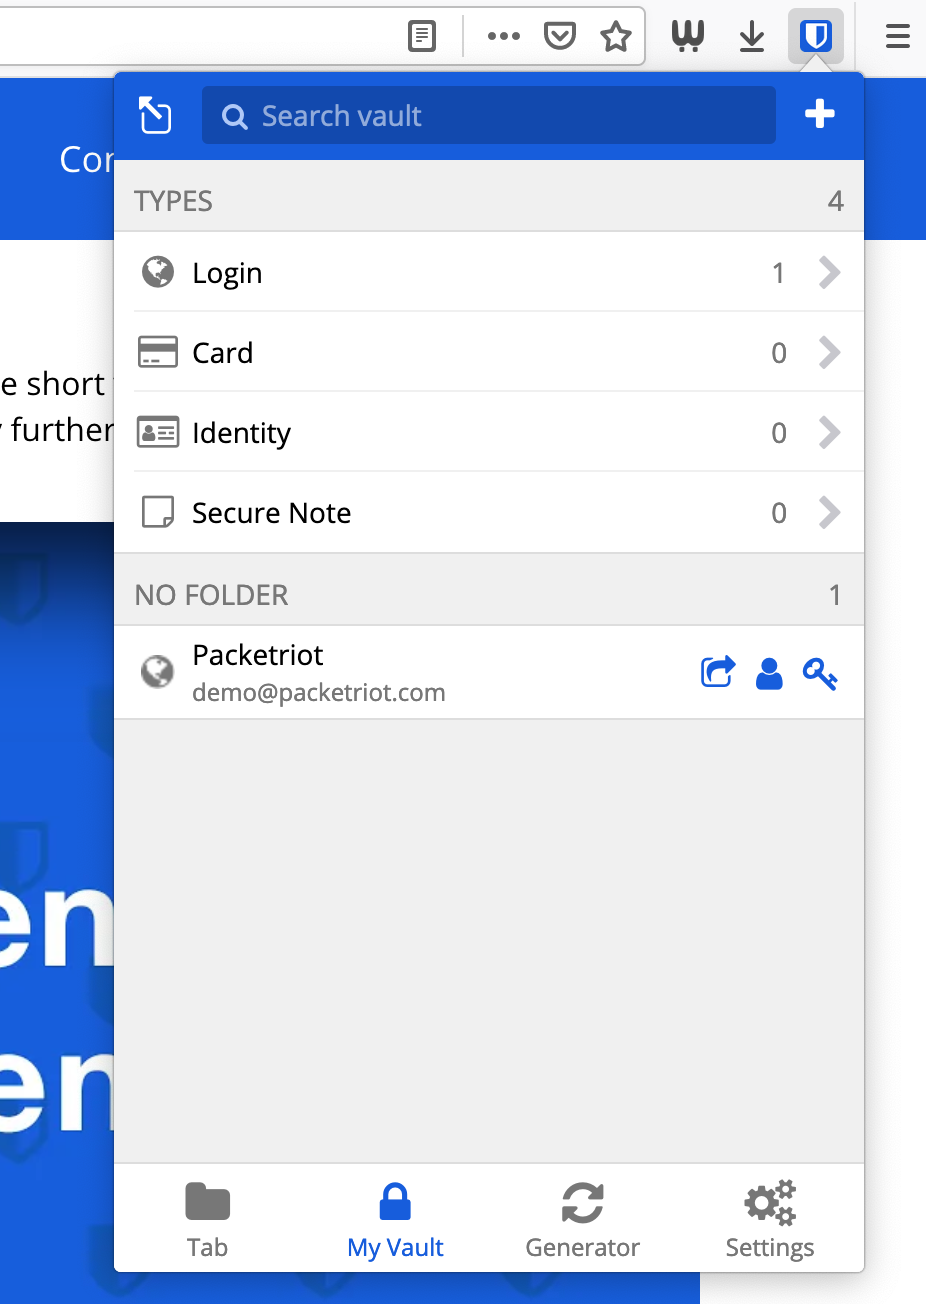
Credentials
Below is a screenshot of us navigating to the Packetriot login page. When you click on the Bitwarden extension icon your credentials will be presented as long as you entered a URL fo the credentials.
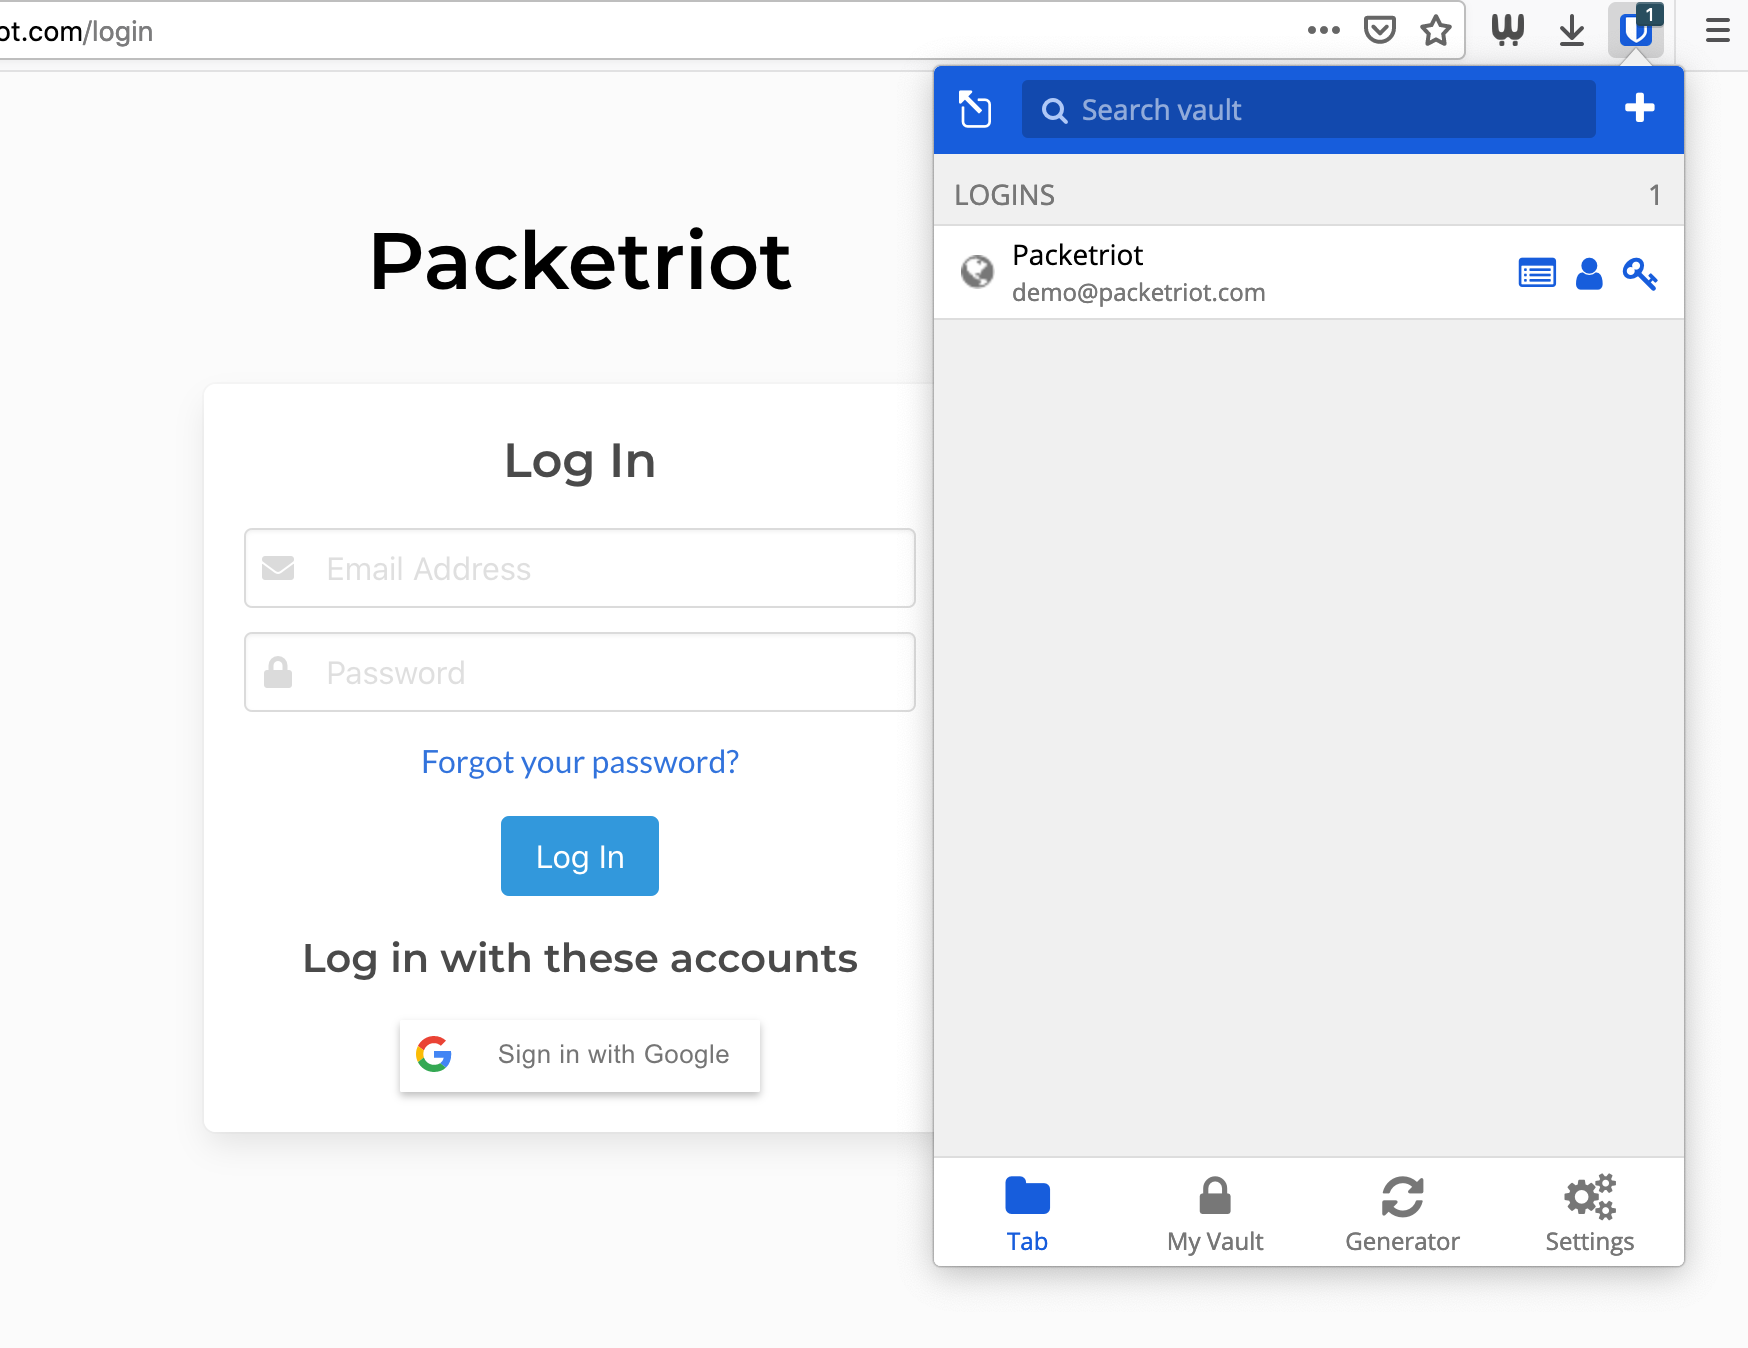
Website Login Example
Mobile Apps
There are companion apps for Android and iOS.
Setting up these applications are very similar to the extension. We need to first setup a custom server URL before logging into our account. Below are screenshots for the iOS app. Both platforms look and work very similarly. There is a settings button in the top-left, click that first.
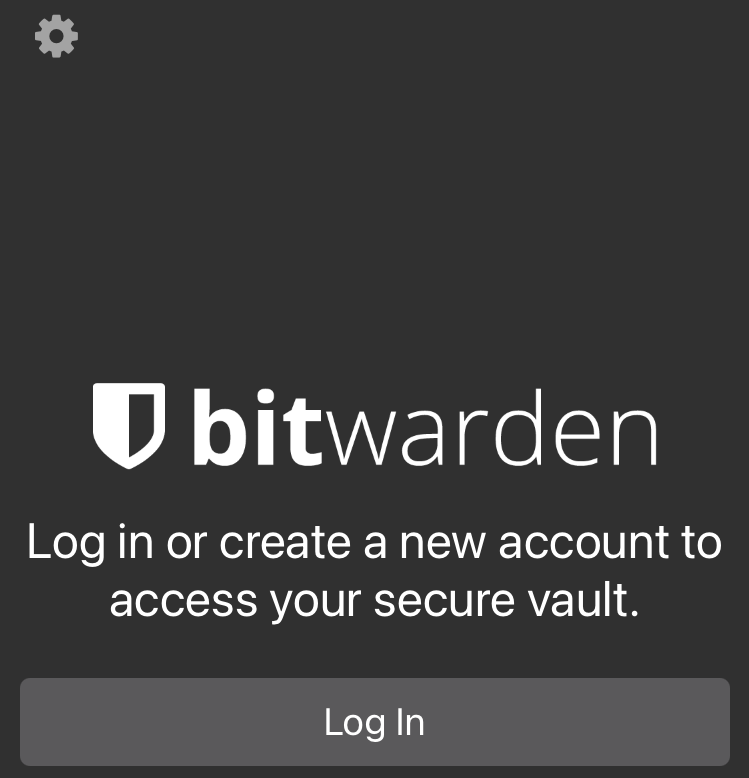
Welcome Screen for iOS
Now input the URL for your Bitwarden server. The URL for this example is https://bitwarden.packetdemo.com.
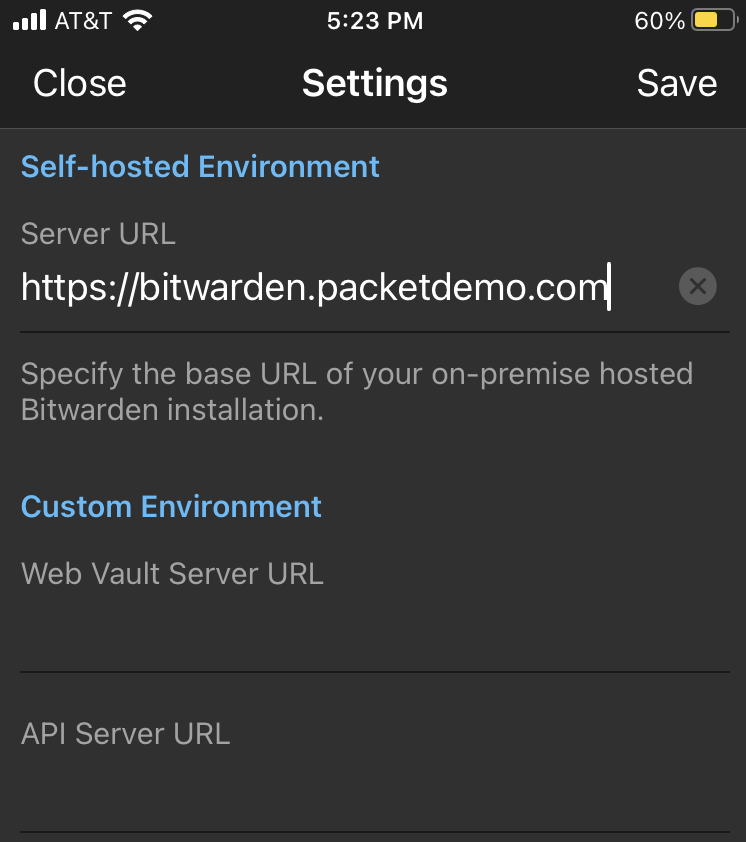
Setup Custom Server URL
Log into your account and you’ll be able to see all the credentials and other info you have stored in your vault.
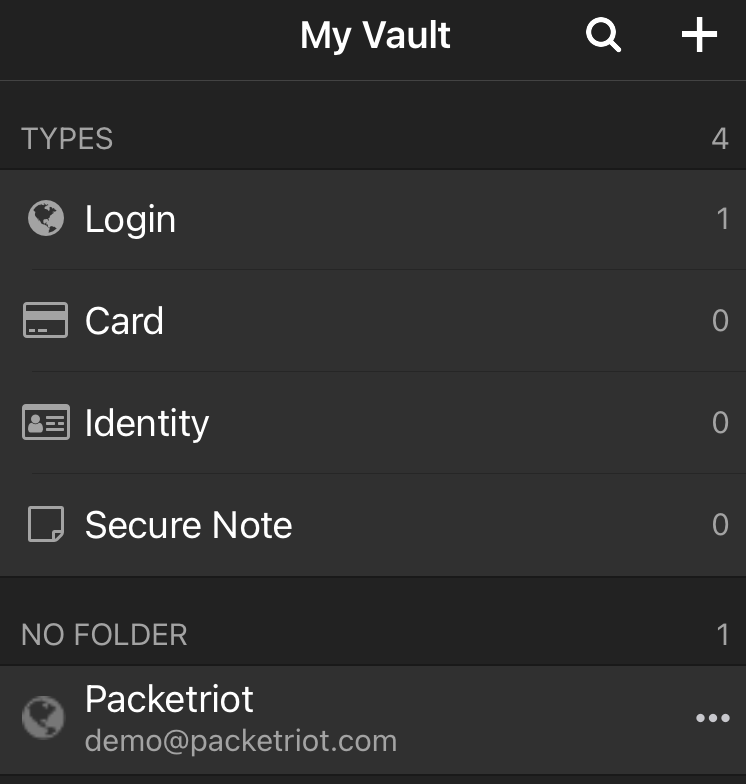
User Account Info
Software Updates
Keeping up with software should be easy with the conventions we used in this setup. This is because all of our application data for all of our containers (Bitwarden, Packetriot) is being stored on the host and not inside the container.
Below are commands you can run to refresh all the software for all of the containers.
[user@host ] cd ~/containers

# remove exisitng containers
[user@host:~/containers ] docker-compose down

# pull down updates
[user@host:~/containers ] docker pull packetriot/pktriot:latest
[user@host:~/containers ] docker pull bitwardenrs/server:latest

# recreate the containers
[user@host:~/containers ] docker-compose up -d
Conclusion
I would highly recommend using Bitwarden in case you don’t already use a password manager. Setup was straight forward, the authors have done an excellent job making it easy to configure and get running.
I’ve found the extension and companion mobile apps to work very well. There are alternatives to Bitwarden that you can host. Psono is another option and it widely used. It too is is opensource and we intend to create a tutorial for setting it up and hosting it.
Please contact us if you have any questions or run into any trouble, we’ll do our best to help :)
We did not cover all options and configurations for Bitwarden but we did provide enough information to setup and administer it. Please refer to the help docs published by Bitwarden for more information.
We hope you enjoyed this tutorial, please share if this was helpful and follow us on Twitter @packetriot for updates and notifications when we write another self-hosting tutorial.
Cheers!